Lesson 8
Relating Area to Circumference
8.1: Irrigating a Field (5 minutes)
Warm-up
The purpose of this activity is for students to estimate the area of a circle by comparing it to a surrounding square.
Launch
Explain that some farms have circular fields because they use center-pivot irrigation. If desired, display these images to familiarize students with the context.
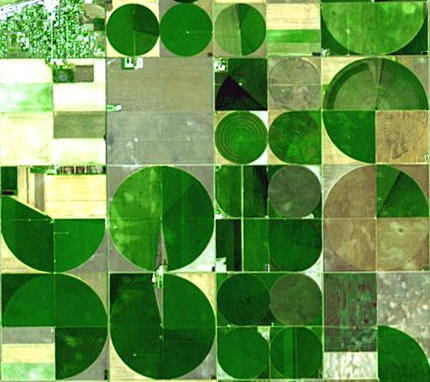
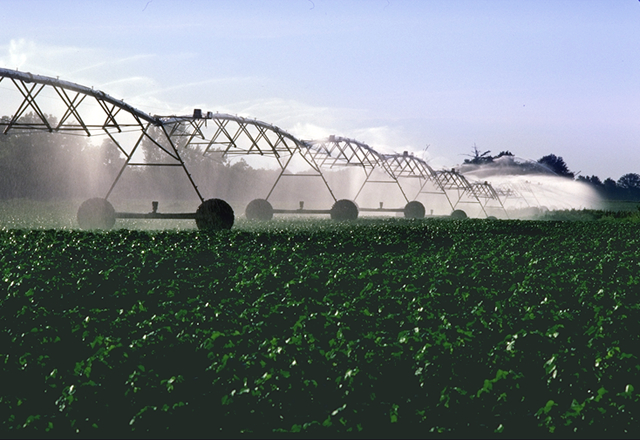
Provide quiet think time followed by whole-group discussion.
Student Facing
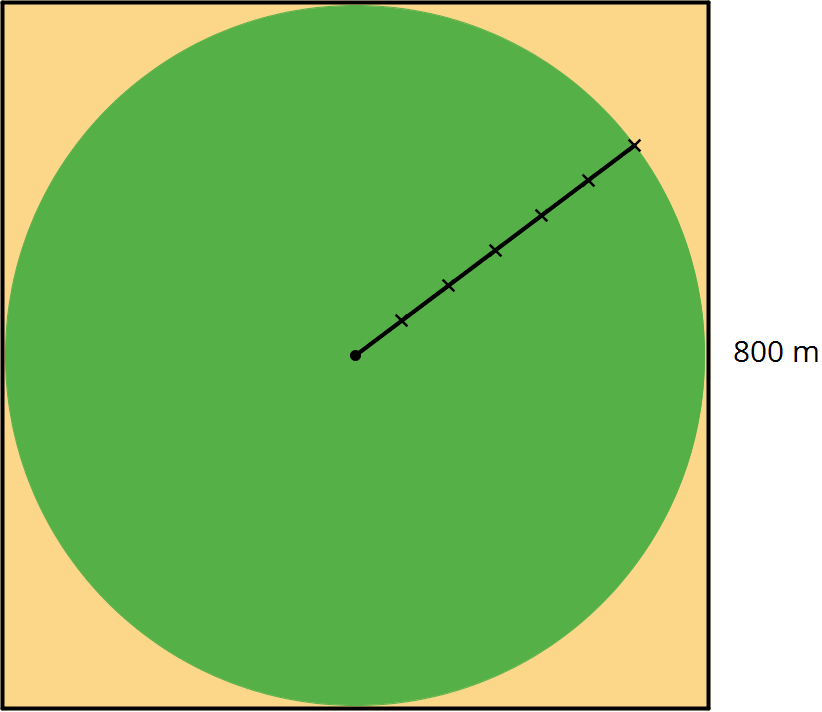
A circular field is set into a square with an 800 m side length. Estimate the field's area.
- About 5,000 m2
- About 50,000 m2
- About 500,000 m2
- About 5,000,000 m2
- About 50,000,000 m2
Student Response
For access, consult one of our IM Certified Partners.
Anticipated Misconceptions
Students might think the answer should be 640,000 m2 because that is the area of the square, not realizing that they are being asked to find the area of a circle. Ask them what shape is the region where the plants are growing.
Some students might incorrectly calculate the area of the square to be 6,400 m2 and therefore estimate that the circle would be about 5,000 m2.
Some students might try to use what they learned in the previous lessons about the relationship between the area of a circle and the area of a square with side length equal to the circle's radius. Point out that the question is asking for an estimate and answer choices all differ by a factor of 10.
Activity Synthesis
Discuss the estimation strategies students used to answer the question. Ask students what the area of the square is in square meters (\(800 \boldcdot 800\), or 640,000). Ask them if the circle's area is greater than or less than the square's area (less). Then ask them to use the picture to determine the best estimate (500,000 since the circle is close in area to the square).
8.2: Making a Polygon out of a Circle (20 minutes)
Activity
The purpose of this activity is for students to use what they know about finding the area of a parallelogram to develop the formula for the area of a circle. This activity builds on the work students did in grade 6 when cutting and rearranging shapes in order to calculate their areas. In this activity, students cut and rearrange parts of a circle to approximate a parallelogram. They see that the area of the parallelogram would be calculated by multiplying half of the circle’s circumference times its radius. Since students are not familiar with the process of writing proofs, it is necessary to walk them through writing the justification that uses the formula for the area of the parallelogram to develop the formula for the area of the circle.
The construction in this activity shows that the constructed parallelogram has a height at most the radius of the circle and a base at most half the circumference of the circle. Establishing equality is beyond grade level and will be addressed again in high school.
The process used to decompose the circle and recompose it into a shape resembling a parallelogram is a good example of MP8. The pie shaped wedges are successively cut in half and rearranged. Each time, the sides of the shape look more like line segments.
Watch for students who identify that the rearranged circle pieces resemble a parallelogram as the pieces get smaller. Also watch for how they estimate the width and height of this parallelogram and invite them to share during the discussion.
Launch
Arrange students in groups of 2. Each group needs a circular object, with a diameter between 3 and 5 inches, and a thick marker with which to trace it. Also provide each group a sheet of white paper, a sheet of colored paper, a pair of scissors, and glue or tape. Remind students that in the past they decomposed and rearranged a shape to figure out its area. Demonstrate how to do the first 4 steps of the activity, and invite students to follow along with your example. Ask how the area of the new shape differs from that of the circle. Solicit some ideas on what the new shape resembles and how the area of such a shape could be approximated. Without resolving this, ask students to continue the process.
Supports accessibility for: Attention; Social-emotional skills
Design Principle(s): Support sense-making; Maximize meta-awareness
Student Facing
Your teacher will give you a circular object, a marker, and two pieces of paper of different colors.
Follow these instructions to create a visual display:
-
Using a thick marker, trace your circle in two separate places on the same piece of paper.
-
Cut out both circles, cutting around the marker line.
-
Fold and cut one of the circles into fourths.
-
Arrange the fourths so that straight sides are next to each other, but the curved edges are alternately on top and on bottom. Pause here so your teacher can review your work.
-
Fold and cut the fourths in half to make eighths. Arrange the eighths next to each other, like you did with the fourths.
-
If your pieces are still large enough, repeat the previous step to make sixteenths.
-
Glue the remaining circle and the new shape onto a piece of paper that is a different color.
After you finish gluing your shapes, answer the following questions.
-
How do the areas of the two shapes compare?
-
What polygon does the shape made of the circle pieces most resemble?
-
How could you find the area of this polygon?
Student Response
For access, consult one of our IM Certified Partners.
Anticipated Misconceptions
Students might not fold the wedges accurately or make a straight cut. Remind them that the halves must be equal.
Activity Synthesis
Ask students which polygon resembles the shape they constructed of circle pieces and how they know. (A parallelogram or rectangle)
For a dynamic visualization, see http://ggbm.at/RUqSMrjn, created in GeoGebra by Malin Christersson, or display this image.
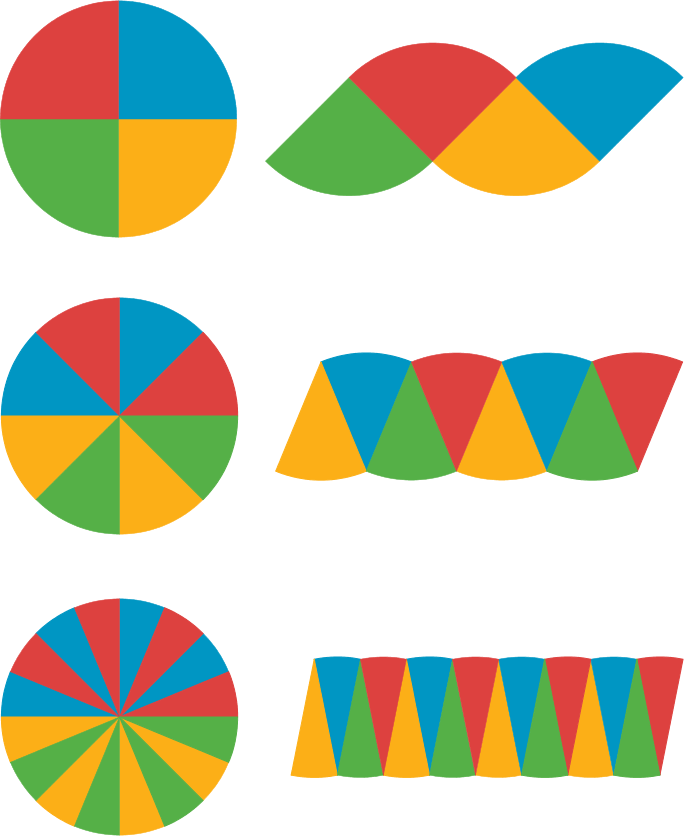
Ask, “If we could continue cutting the wedges in half, how would that affect the new shape?” (It would look even more like a parallelogram or rectangle. The bumpy top and bottom straighten out, and the slanted height becomes more vertical.)
Note that we are going to refer to the bumpy parallelogram-ish shape as the “parallelogram” (in quotes). Ask students to describe comparisons we can make between the measurements in the circle and the “parallelogram.” Record and display these ideas for all to see. It may be helpful to write over the actual images themselves. Students should notice the following measurements, but if they do not, prompt them to look for them:
- The base of the “parallelogram” is approximately equal to half of the circle’s circumference.
- The height of the “parallelogram” is approximately equal to the radius of the circle.
- The areas of the 2 shapes are equal.
Tell students to label these measurements on their visual display:
- “\(\text{Circumference} = \pi d\)” around the circle
- “\(\frac12 \text{Circumference} = \pi r\)” at the base of the “parallelogram”
- “Radius” on the radius of the circle (needs to be drawn in)
- “Radius” on the height of the “parallelogram” (needs to be drawn in)
If students struggle to understand these relationships through the abstract variables, consider measuring your example circle and using the numerical measurements to talk about these relationships.
Ask students to discuss the different ways we can calculate the area of the “parallelogram.” Students should share the following ways:
- \(\text{Area} = \text{Base} \boldcdot \text{Height}\)
- \(\text{Area} = \frac12 \text{Circumference} \boldcdot \text{Radius}\)
- \(\text{A} = \pi r \boldcdot r\)
- \(\text{A} = \pi r^2\)
Tell students to record these ideas on their visual display. Display student work for all to see. If students do not bring up one of these ideas, make it explicit in the discussion.
8.3: Making Another Polygon out of a Circle (10 minutes)
Optional activity
The purpose of this activity is for students to consider a different way to cut and reassemble a circle into something resembling a polygon in order to calculate its area. This time the polygon is a triangle, but the area of the circle can still be found by multiplying \(\frac12\) times the circumference times the radius.
In the previous activity, students had experience following along as the teacher developed the justification. This time give students the opportunity to write their own justification for the area of a circle. As students work, monitor and select students who have clear, but different, explanations to share during the whole-group discussion. In particular, select students who use the following steps:
- \(\text{Area} = \frac12 \boldcdot \text{base} \boldcdot \text{height}\)
- \(\text{Area} = \frac12 \boldcdot \text{circumference} \boldcdot \text{radius}\)
- \(\text{Area} = \frac12 \boldcdot (\pi d) \boldcdot r\)
- \(\text{Area} = \pi r \boldcdot r\)
- \(\text{Area} = \pi r^2\)
If the bands making up the circle really did not stretch, then they would not form rectangles when they are unwound because the circumference of the inner circle is not the same as the circumference of the outer circle in each band. A rectangle is an appropriate approximation for the shape in terms of calculating its area.
Launch
Give students quiet work time followed by partner and whole-class discussion. Applet created in GeoGebra by timteachesmath.
Supports accessibility for: Memory; Conceptual processing
Student Facing
Imagine a circle made of rings that can bend but not stretch.

Watch the animation.
-
What polygon does the new shape resemble?
-
How does the area of the polygon compare to the area of the circle?
-
How can you find the area of the polygon?
-
Show, in detailed steps, how you could find the polygon’s area in terms of the circle’s measurements. Show your thinking. Organize it so it can be followed by others.
-
After you finish, trade papers with a partner and check each other’s work. If you disagree, work to reach an agreement. Discuss:
-
Do you agree or disagree with each step?
-
Is there a way they can make the explanation clearer?
-
-
Return your partner’s work, and revise your explanation based on the feedback you received.
Student Response
For access, consult one of our IM Certified Partners.
Launch
Give students quiet work time followed by partner and whole-class discussion.
Supports accessibility for: Memory; Conceptual processing
Student Facing
Imagine a circle made of rings that can bend, but not stretch.

- What polygon does the new shape resemble?
-
How does the area of the polygon compare to the area of the circle?
-
How can you find the area of the polygon?
-
Show, in detailed steps, how you could find the polygon’s area in terms of the circle’s measurements. Show your thinking. Organize it so it can be followed by others.
-
After you finish, trade papers with a partner and check each other’s work. If you disagree, work to reach an agreement. Discuss:
-
Do you agree or disagree with each step?
-
Is there a way to make the explanation clearer?
-
-
Return your partner’s work, and revise your explanation based on the feedback you received.
Student Response
For access, consult one of our IM Certified Partners.
Anticipated Misconceptions
If students struggle to imagine the circle and how it is cut and rearranged, suggest a familiar material for the rings that bends but does not stretch (for example, a cord or chain).
Activity Synthesis
Ask selected students to explain their steps for finding the area in terms of the circle’s measures. Ask the class whether they agree, disagree, or have questions after each student shares their reasoning.
Design Principles(s): Optimize output (for explanation); Maximize meta-awareness
8.4: Tiling a Table (5 minutes)
Activity
The purpose of this activity is for students to apply the formula for area of a circle to solve a problem in context. The diameter of the circle is given, so students must first determine the radius.
Launch
Display this image of table top for all to see. Ask students, “What do you notice? What do you wonder?”
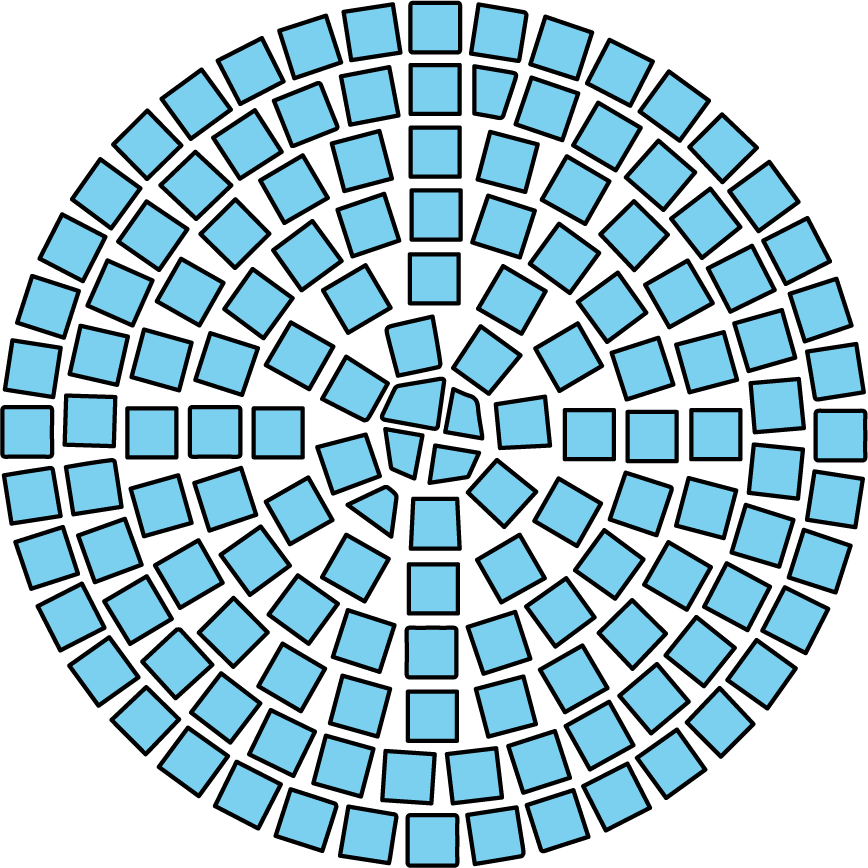
Quiet work time followed by a whole-class discussion.
Student Facing
Elena wants to tile the top of a circular table. The diameter of the table top is 28 inches. What is its area?
Student Response
For access, consult one of our IM Certified Partners.
Student Facing
Are you ready for more?
A box contains 20 square tiles that are 2 inches on each side. How many boxes of tiles will Elena need to tile the table?
Student Response
For access, consult one of our IM Certified Partners.
Anticipated Misconceptions
Students may square the diameter, forgetting that they need to determine the radius first.
Activity Synthesis
Invite students to share their strategies for finding the area of the tabletop. After 3 students have shared their strategies, ask the class what formula all of the students used for finding the area of a circle. Record and display this formula, \(A = \pi r^2\), for all to see. Here, \(A\) is the area of the circle, and \(r\) is the radius of the circle.
Supports accessibility for: Language; Social-emotional skills
Lesson Synthesis
Lesson Synthesis
The main ideas are:
- We can find the area of a circle if we know the radius or the diameter.
- We know that the radius is half the length of the diameter.
- The formula for finding area of a circle is \(A=\pi r^2\).
Discussion Questions:
- How would you find the area of a circle with a radius of 10? (Multiply \(\pi\) times 100, because \(10^2 = 100\).)
- How would you find the area of a circle with a diameter of 10? (Multiply \(\pi\) times 25, because \(10 \div 2 = 5\) and \(5^2 = 25\).)
8.5: Cool-down - A Circumference of 44 (5 minutes)
Cool-Down
For access, consult one of our IM Certified Partners.
Student Lesson Summary
Student Facing
If \(C\) is a circle’s circumference and \(r\) is its radius, then \(C=2\pi r\). The area of a circle can be found by taking the product of half the circumference and the radius.
If \(A\) is the area of the circle, this gives the equation:
\(A = \frac12 (2\pi r) \boldcdot r\)
This equation can be rewritten as:
\(A=\pi r^2\)
(Remember that when we have \(r \boldcdot r\) we can write \(r^2\) and we can say “\(r\) squared.”)
This means that if we know the radius, we can find the area. For example, if a circle has radius 10 cm, then the area is about \((3.14) \boldcdot 100\) which is 314 cm2.
If we know the diameter, we can figure out the radius, and then we can find the area. For example, if a circle has a diameter of 30 ft, then the radius is 15 ft, and the area is about \((3.14) \boldcdot 225\) which is approximately 707 ft2.