Lesson 1
How Would You Describe These Figures?
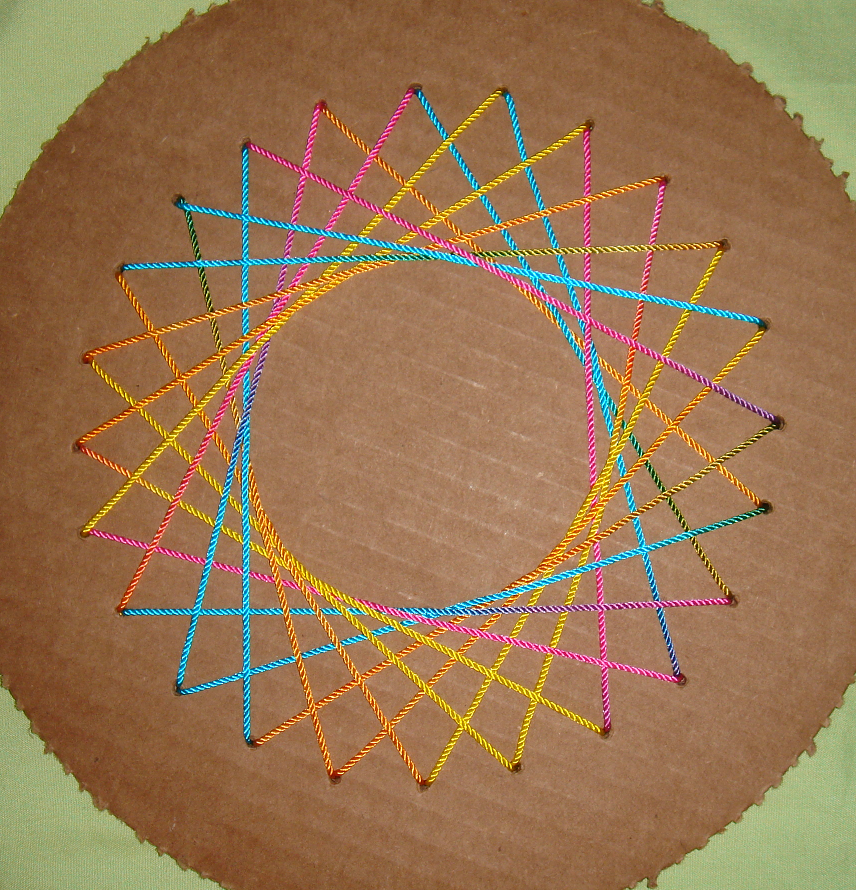
Warm-up: Notice and Wonder: String Art (5 minutes)
Narrative
This warm-up prompts students to generate formal and informal geometric language (lines, points, straight, curved) that will be used in an upcoming task by familiarizing themselves with a context and the mathematics that might be involved.
When students articulate what they notice and wonder, they have an opportunity to attend to precision in the language they use to describe what they see (MP6). They might first propose less formal or imprecise language, and then restate their observation with more precise language in order to communicate more clearly.
Launch
- Groups of 2
- Display the image.
- “What do you notice? What do you wonder?”
- 1 minute: quiet think time
Activity
- “Discuss your thinking with your partner.”
- 1 minute: partner discussion
- Share and record responses.
Student Facing
What do you notice? What do you wonder?
Student Response
For access, consult one of our IM Certified Partners.
Activity Synthesis
- “Which words or terms came up multiple times in the observations you made and in the questions you had?” (point, line, straight)
- “We’ll work with these geometric features in this lesson and in upcoming ones. Let’s see what we can find out about them.”
Activity 1: Do You See What I See? (25 minutes)
Narrative
The purpose of this activity is to motivate a need for more precise geometric language. Students work with a partner to replicate given geometric images—one partner describes the images and the other draws them solely based on the verbal descriptions from their partner. Students do this over several rounds, switching roles after two rounds. As students attempt to produce more accurate drawings, they try to fine-tune their descriptions. They notice that more specific language or terminology is needed to better describe the features in the images (MP6).
Here are the two sets of images:
Set 1


Set 2


As students are working, listen for and collect the terms or descriptions that come up often or that effectively help the drawer replicate the image (for example: horizontal, vertical, point, lines, segment, top, bottom, and so on).
This activity uses MLR2 Collect and Display. Advances: conversing, reading, writing.
Supports accessibility for: Organization, Language, Social-Emotional Functioning
Required Materials
Materials to Gather
Materials to Copy
- Do You See What I See?
Required Preparation
- Create a set of 4 cards from the blackline master for each group of 2.
- Create a poster with the two images shown in activity synthesis.
Launch
- Groups of 2
- Read the instructions together as a class. Demonstrate or clarify the process as needed.
- Give each student a ruler or a straightedge. Give each group four blank (unlined) index cards.
Activity
- Give 4 blank cards to each group.
- Give one partner the first image card from Set 1. When the group is done with the first round and has discussed the drawing, give the second card.
- 3–4 minutes per round.
MLR2 Collect and Display
- Circulate, listen for, and collect the language students use to describe the first and second images. Listen for: line, point, straight, corner, quadrilateral, triangle, rhombus, vertical, horizontal, middle, top, bottom, left, right.
- Record students’ words and phrases on a visual display and update it throughout the lesson.
- Repeat for the second partner, using the cards from Set 2.
Student Facing
Work with a partner in this activity. Sit back to back or use a divider to block each other’s view.
Partner A:
- Your teacher will give you a card. Don’t show it to your partner.
- Describe the image on the card—as clearly and precisely as possible—so that your partner can draw it on a blank card.
Partner B:
- Your teacher will give you a blank card.
- Your partner will describe an image. Listen carefully to the descriptions. On your card, create a drawing as described.
-
When done, compare the given image and the drawn image. Discuss:
-
Which parts were accurate? Which were off?
-
How could the descriptions be improved so the drawing could be more accurate?
-
Which words or descriptions are useful?
-
- Try again with a second card from your teacher. When done, compare and discuss the images again.
- Switch roles and repeat the exercise. Your teacher will give you 2 new cards (1 for each round).
Student Response
For access, consult one of our IM Certified Partners.
Advancing Student Thinking
- “What words could you use to help your partner draw that part of the figure exactly how you want it?”
- “How could you break the _____ you see into parts? How could you describe how to draw each part?”
Activity Synthesis
- “Are there any other words or phrases that are important to include on our display?”
-
Display the chart of terms and these images to facilitate discussion. Annotate on them to support students with mathematical terms.
- As students share responses, update the display, by adding (or replacing) language, diagrams, or annotations.
- Remind students to borrow language from the display as needed.
- “How did you describe what you saw?” (By describing where the lines start and where they end, their directions, the distances between them, what they look like—if they look like a familiar shape or letter.)
- “What words or descriptions were more helpful when describing the figures and which were less helpful?” (Helpful examples: line, point, straight, corner, triangle, rhombus, vertical, horizontal, middle, top, bottom, left, right. Less helpful examples: here, there, a little bit, pointy, slanted.)
- “What was easy to describe?” (Lines that start a corner or the middle of an edge, lines that go left and right or up and down.)
- “What was not?” (Lines that cross other lines or that stop at hard-to-describe points.)
- “Did anyone measure something or use measurements? When might measurements have been helpful?” (When describing distances between lines or the position of a starting point.)
Activity 2: Lines and Line Segments (15 minutes)
Narrative
The purpose of this activity is to enable students to notice segments as parts of lines and motivate a need for a term to describe them.
Students are asked to draw multiple lines and to notice shapes that intersecting lines might have created. As they look for familiar shapes or figures in their drawing—polygons, letters, or numbers—their attention shifts from the lines to portions of the lines that make up those figures. Certain sections of the lines now have new significance apart from the lines that contain them. The observations here prepare students to better understand the mathematical definition of line segments.
The synthesis introduces the term line segment informally. In the next lesson, the meaning of the term, as well as of the meanings of lines and points, will be formalized.
Required Materials
Materials to Gather
Launch
- Groups of 3–4
- Give each student a ruler or a straightedge.
- Display the image of dots.
- “What do you notice?” (There are lots of dots or points. If we connect them, we can make shapes. I see triangles, rhombuses, and hexagons. The dots make straight lines left to right, and they are the same distance apart.)
- “What do you wonder?” (Why are the points in one row not lined up with the points in the rows above or below it? Will we be connecting the dots?)
- “In this activity, we will use the dots in the image to make different figures.”
- Demonstrate drawing a line through a set of dots in the isometric dot image, extending them as far as possible.
Activity
- 3 minutes: independent work time
- 2 minutes: partner discussion
- As students discuss, listen for informal descriptions of points, lines, and line segments.
Student Facing
Here is a field of dots.

- Draw 5 lines, each one connecting at least 2 dots and extending as far as possible.
-
Did your lines make some familiar shapes or figures—perhaps a triangle, quadrilateral, a letter, or a number?
Identify at least one familiar shape or figure in your drawing. Trace the shape with a heavier mark or use a color pencil to make it obvious.
-
Share your drawing with your group members. Discuss:
- How are the drawings alike? What do all the shapes have in common?
- How are the drawings different?
Student Response
For access, consult one of our IM Certified Partners.
Activity Synthesis
- Display the image on the task statement. Invite students to share their drawings and their responses to the discussion questions.
- “How are your drawings alike?” (They all have long lines. The shapes are made of shorter pieces of the lines. Some of those pieces end in dots. Others are cut off by another line.)
- “How are your drawings different?” (The lines made different shapes and letters. Some shapes are made of parts that always end in dots. Others have parts that don’t end in dots.)
- Display the annotated chart from the previous activity.
- “Each part of a line that makes up your shape is called a line segment or a segment. We can see where a segment starts and where it stops.”
- Ask students to point out to their partners some segments in their drawings.
- “Some of you have used the word ‘points’ to describe the dots or certain parts of the figures you drew.”
- “How many points do you see marked on this line or line segment? Where are they?” (I see 3 points marking the top of my 7.)
- “Can you show your partner some points in the figures you drew?”
Lesson Synthesis
Lesson Synthesis
“Today we described some drawings and created some drawings based on descriptions. We noticed how points, lines, and segments are present in the drawings, and that those terms were handy for describing what we were seeing.”
“Let’s look at image 2 of set 1 from the first activity.”
Draw a quick sketch of this image to annotate during discussion.

"Let’s imagine that the lines that reach the edge of the card actually go on if the card was larger.”
Annotate sketch to demonstrate extended lines.

“How many lines do you see?” (four)
Label each line as students identify.

“Where do you see points in this drawing?” (Students are likely to identify vertices of the triangle and also places where lines intersect.)
As students identify points, add each to the sketch for reference.
“Which points were most helpful when describing the drawing to a friend?” (the points where the lines cross one another, or the points where the lines cross the edges of the card)

“Where are the line segments in this image?” (any part of a line with a starting point and an ending point)
“How many segments do you see in this drawing?” (Students are likely to say 8, but there are more, including pieces that go from one edge of the card to another edge.)
Cool-down: Lines and More (5 minutes)
Cool-Down
For access, consult one of our IM Certified Partners.