Lesson 2
How Do We Measure Area?
Warm-up: Which One Doesn’t Belong: Shapes with Squares (10 minutes)
Narrative
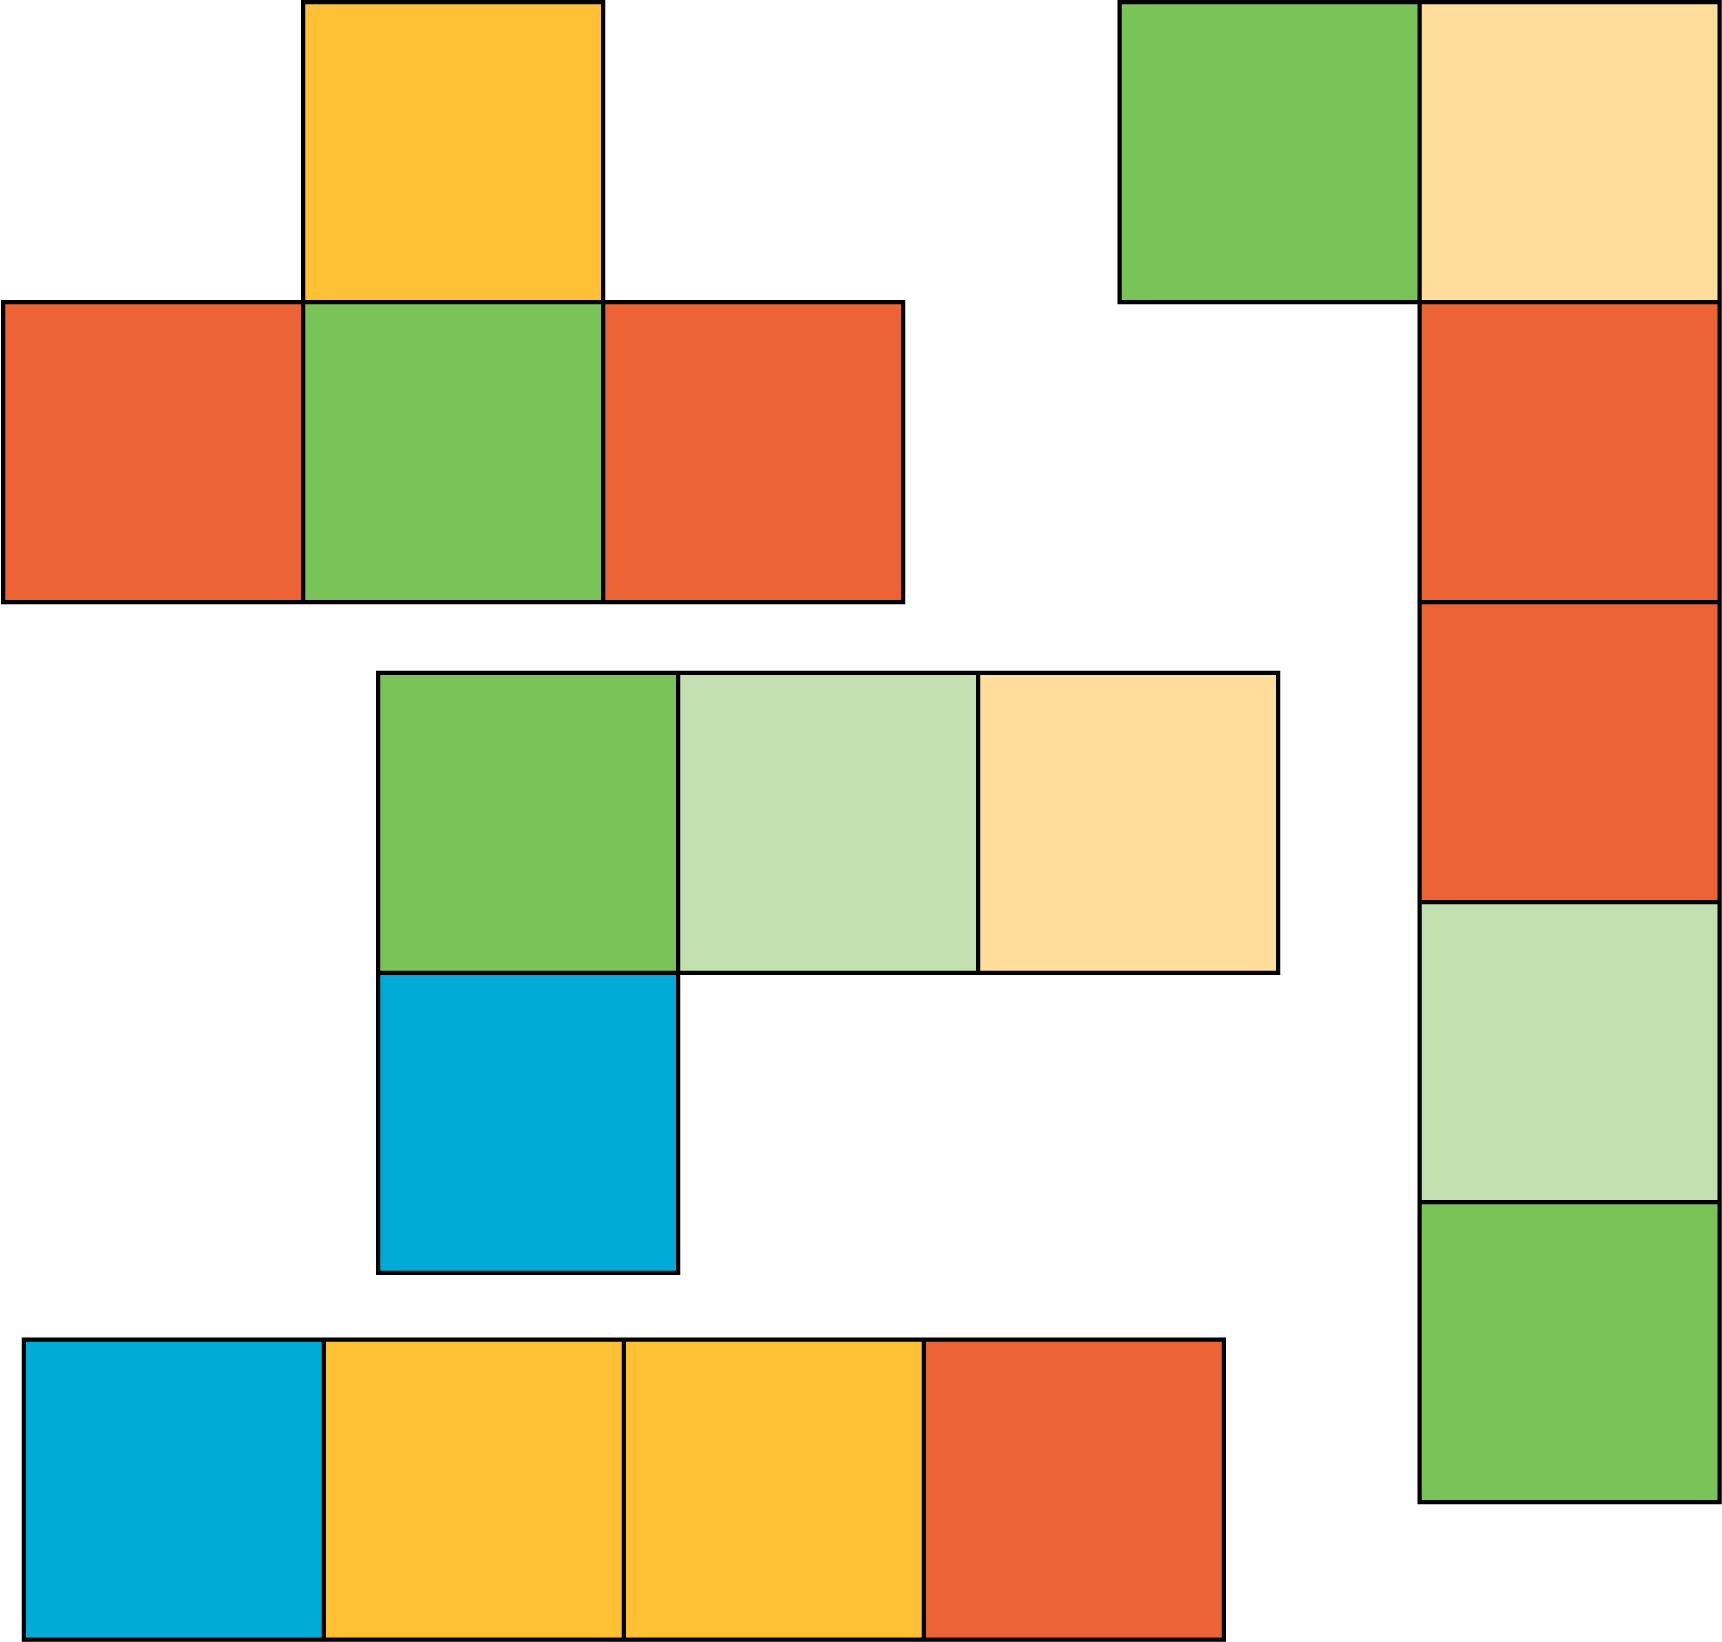
The purpose of this warm-up is to elicit observations about tiled squares by comparing four images. The work here prepares students to reason about unit squares later in the lesson and gives students a reason to use language precisely (MP6). It gives the teacher an opportunity to hear how students use terminology and talk about characteristics of the shapes in comparison to one another. During the synthesis, ask students to explain the meaning of any terminology they use, such as longest, largest, and area.
Launch
- Groups of 2
- Display the image.
- “Pick one that doesn’t belong. Be ready to share why it doesn’t belong.”
- 1 minute: quiet think time
Activity
- “Discuss your thinking with your partner.”
- 2–3 minutes: partner discussion
- Share and record responses.
Student Facing
Which one doesn’t belong?


Student Response
For access, consult one of our IM Certified Partners.
Activity Synthesis
- “What are some different attributes you compared in these images?” (How many squares were in each image, the size of the smaller squares, the overall shape, and shading.)
-
Consider saying: “Let’s find at least one reason why each one doesn’t belong.”
Activity 1: Create and Compare (20 minutes)
Narrative
The purpose of this activity is for students to explore area by making shapes out of square tiles and ordering the shapes from smallest to largest. Students may consider the size of the shapes in a variety of ways.


For example, they may see the first shape as larger than the second shape because the squares in the former are more spread out than in the latter, which is completely filled with tiles.
If needed, encourage students not to stack the tiles. In the synthesis, students learn they can count the square tiles to determine the amount of space a shape covers.
Required Materials
Materials to Gather
Required Preparation
- Each group of 4 needs 80 square tiles.
Launch
- Groups of 4
- Give each group inch tiles.
- “Take some tiles and build your shape.”
- 2 minutes: independent work time
Activity
- “Now work with your group to order the shapes. Be prepared to explain how you ordered the shapes.”
- 5 minutes: group work time
- Monitor for groups who order by:
- the amount of space the shape takes up on the table
- the length of the shape
- the number of tiles used to create the shape
Student Facing
- Take a handful of square tiles.
- Create a shape from the tiles.
- As a group, order the shapes from smallest to largest.
Student Response
For access, consult one of our IM Certified Partners.
Activity Synthesis
- “How did you order the shapes from smallest to largest?” (We compared the length of each shape. We counted how many tiles it took to make each shape.)
- As students share, consider asking: “How did you decide how much space each shape covered?”
- “It is common to use squares like the square tiles we used in this activity to determine each square tile has one square unit of area. If we count the number of tiles that make up a shape, we can find the area of the shape. For example, if a shape is covered by 12 square tiles, it has an area of 12 square units.”
Activity 2: Use Square Tiles to Measure Area (15 minutes)
Narrative
The purpose of this activity is for students to use square tiles to measure area. Students are given square tiles and a variety of figures. Students learn that they can use the term “figure” to describe a shape that doesn’t have a specific name. Students cover the figures completely with square tiles and use the number of tiles to describe the area of the figure. In the synthesis, students share ideas about how to tile shapes in any way that makes sense to them. They also consider why it’s important to make sure they don’t leave gaps when they use square tiles to measure area (MP6).
Here are the figures on the blackline master for reference:
1.

2.

3.

4.

5.

6.

There is an opportunity to ask students about the figures whose area is the easiest to find. There is no right or wrong answer, but the question may elicit the idea that the structure of rectangles is helpful. This idea will be explored fully in future lessons.
Supports accessibility for: Organization, Attention, Social-emotional skills
Required Materials
Required Preparation
- Each group of 2 needs 80 square tiles.
Launch
- Groups of 2
- “Now that we know we can count square tiles to find area, we can think about covering shapes with tiles to find their area. We call this tiling. In this activity you will tile each shape with square tiles to find the area.”
- Give each group a copy of the blackline master and inch tiles.
- “Some of these aren’t shapes that we have names for like a square or triangle. Because of this, we can call them ‘figures’ as we work with them in this activity. This word will be helpful in describing other shapes that we don’t have names for.”
Activity
- 7–10 minutes: partner work time
- Monitor for students who:
- keep tiling the whole figure all the way to the edges
- do not leave gaps between the square tiles as the figure is tiled
Student Facing
Your teacher will give you handouts with some figures on them.
Use square tiles to find the area of each figure. Record your answers here. Be prepared to explain your reasoning.
- Area: _____ square units
- Area: _____ square units
- Area: _____ square units
- Area: _____ square units
- Area: _____ square units
- Area: _____ square units
Student Response
For access, consult one of our IM Certified Partners.
Activity Synthesis
- Display the first, fourth, and fifth figures.
- “How did you tile each figure?” (I filled the whole figure with tiles until I couldn’t fit any more. I started with the bottom row, then made the row above it until the figure was full.)
- “How did you determine the area of each figure?” (I counted the number of tiles it took to fill each figure completely.)
- Consider asking, “Which figures did you and your partner think were easiest to find the area of?” (The rectangle, because there were clear rows and columns. The third one, because we could split it into 2 rectangles. All of them, because they could all be covered completely with square tiles and had no uncovered space.)
- “Why was it important not to leave any gaps as you tiled your figures?” (Because the whole figure needs to be completely covered. If there are gaps between tiles or around the edge, then the whole figure isn’t covered.)
Lesson Synthesis
Lesson Synthesis
“Today we used square tiles to find area. What were some things that were important to think about or do as you used the square tiles to find area?” (I had to make sure I covered the whole figure. I had to count to see how many square tiles I used to cover the figure. The number of square tiles it took to cover the figure is the area of the figure.)
Cool-down: Tile and Tell (5 minutes)
Cool-Down
For access, consult one of our IM Certified Partners.