Lesson 11
Slicing Solids
11.1: Prisms, Pyramids, and Polyhedra (5 minutes)
Warm-up
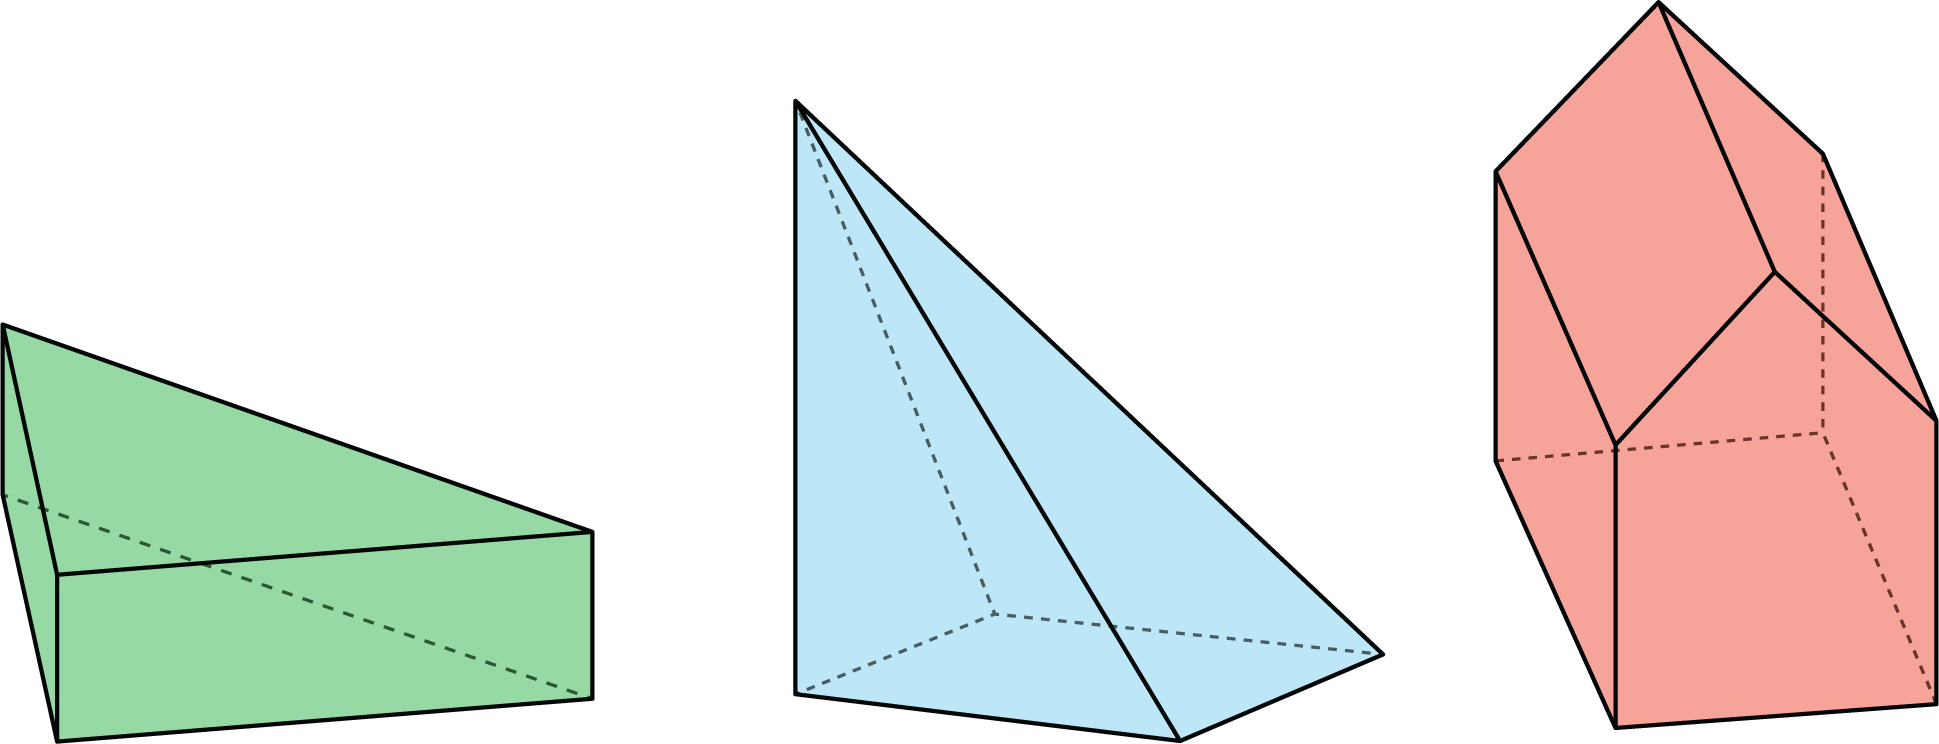
The purpose of this warm-up is to review important characteristics of prisms, pyramids, and polyhedra. Students should be able to interpret the two-dimensional pictures and three-dimensional objects, understanding that the dotted lines indicate hidden lines and identify all of the parts of the polyhedra.
Launch
Ask students, “What do you see? Describe the object and its parts as precisely as you can.” Give students 2 minutes of quiet work time followed by a whole-class discussion.
If students have access to digital activities, there is an applet for them to explore while answering the question.
Student Facing
Describe each shape as precisely as you can. Click on the applet and drag the mouse to show the object turning in 3D.
Student Response
For access, consult one of our IM Certified Partners.
Launch
Ask students, “What do you see? Describe the object and its parts as precisely as you can.” Give students 2 minutes of quiet work time followed by a whole-class discussion.
If students have access to digital activities, there is an applet for them to explore while answering the question.
Student Facing
Describe each shape as precisely as you can.
Student Response
For access, consult one of our IM Certified Partners.
Anticipated Misconceptions
Students may think that a pyramid must have its apex over the center of the base. Students may think that a prism (or pyramid) must have base at the “bottom”.
Activity Synthesis
Ask students to describe each shape. Record and display their responses for all to see. After each student shares, ask the group if they have anything to add before moving on to the next shape.
If not mentioned by students, explain:
- A prism is a polyhedron with two identical polygon bases, connected by rectangles.
- A pyramid is a polyhedron with one polygon base, and all other faces are triangles meeting at a point.
11.2: What's the Cross Section? (10 minutes)
Activity
The goal of this activity is to help visualize cross sections of a three-dimensional object. One way to do this is to cut a solid object and use one or both of the pieces to stamp the resulting cross section onto paper. This helps students see the two-dimensional shape that results from cutting a three-dimensional object. During the launch of this activity, students see a demonstration of cutting a fruit or vegetable and are asked to describe the shape of the cross section. Students are then asked to describe the shape of a cross section of a three-dimensional object given to them in the task statement.
As students work on the task, monitor for students who can describe the two-dimensional shape produced from each cross section described.
Launch
Cut the fruit or vegetable so that the cut is in a plane. Some choices: cut an apple vertically, through the stem. (The cross section will be somewhat heart-shaped, with an indentation.) Cut any through the “equator” (The cross section will be a circle.) Carrot or long potato, cut diagonally (The cross section will be an ellipse, oval, or stretched circle.) Before showing students the cut surface, ask students what shape they think the surface is. Then dip the surface into the paint and stamp on a piece of paper. Then put the cut vegetable back together so that both sides of the cut are painted. Show that the resulting pieces each have a cut surface, and the two surfaces are identical.
Display the paper with the painted cross section for all to see. Invite students to describe the shape of the cross section. Tell students that in this activity they are going to have to describe the shape of something after a cut is made. Give students 2–3 minutes of quiet work time followed by time to discuss the shapes with their partner. Follow with a whole-class discussion.
If students do not have access to the digital version of the activity, consider projecting the applet and demonstrating for all to see (if possible).
Supports accessibility for: Conceptual processing
Design Principle(s): Support sense-making; Maximize meta-awareness
Student Facing
Here are a rectangular prism and a pyramid with the same base and same height. Drag the large red point up and down to move the plane through the solids.
-
If we slice each solid parallel to its base halfway up, what shape cross sections would we get? What is the same about the cross sections? What is different?
-
If we slice each solid parallel to its base near the top, what shape cross sections would we get? What is the same about the cross sections? What is different?
Student Response
For access, consult one of our IM Certified Partners.
Launch
Cut the fruit or vegetable so that the cut is in a plane. Some choices: cut an apple vertically, through the stem. (The cross section will be somewhat heart-shaped, with an indentation.) Cut any through the “equator” (The cross section will be a circle.) Carrot or long potato, cut diagonally (The cross section will be an ellipse, oval, or stretched circle.) Before showing students the cut surface, ask students what shape they think the surface is. Then dip the surface into the paint and stamp on a piece of paper. Then put the cut vegetable back together so that both sides of the cut are painted. Show that the resulting pieces each have a cut surface, and the two surfaces are identical.
Display the paper with the painted cross section for all to see. Invite students to describe the shape of the cross section. Tell students that in this activity they are going to have to describe the shape of something after a cut is made. Give students 2–3 minutes of quiet work time followed by time to discuss the shapes with their partner. Follow with a whole-class discussion.
If students do not have access to the digital version of the activity, consider projecting the applet and demonstrating for all to see (if possible).
Supports accessibility for: Conceptual processing
Design Principle(s): Support sense-making; Maximize meta-awareness
Student Facing
Here is a rectangular prism and a pyramid with the same base and same height.

-
Think about slicing each solid parallel to its base, halfway up. What shape would each cross section be? What is the same about the two cross sections? What is different?
-
Think about slicing each solid parallel to its base, near the top. What shape would each cross section be? What is the same about the two cross sections? What is different?
Student Response
For access, consult one of our IM Certified Partners.
Student Facing
Are you ready for more?
Describe the cross sections that would result from slicing each solid perpendicular to its base.
Student Response
For access, consult one of our IM Certified Partners.
Anticipated Misconceptions
Some students may struggle to visualize slicing the solids that are shown. It may be helpful to use a three-dimensional model of the rectangular prism and rectangular pyramid to demonstrate where the cut is happening in each question. Building the solids out of salt dough and slicing them with dental floss is another option.
Activity Synthesis
Select previously identified students to describe the shapes of cross sections of the objects. Consider asking some of the following questions:
- “How do the cross sections in the different objects compare to one another?” (One is a scaled copy of the other.)
- “How do the cross sections in each object compare to its own base?” (In the cube, the cross section is the same as the base, in the pyramid, the cross section is a scaled copy of the base.)
Explain to students that in the next activity they will get another chance to determine shapes of different cross sections.
11.3: Card Sort: Cross Sections (10 minutes)
Activity
In this activity, students practice visualizing cross sections in a more abstract way by looking at images of a solid object that has been cut by a plane and matching those images to the shapes created by the cuts. The cuts made in this activity vary from the previous activity in that the cuts are not all parallel to the base of the three-dimensional object.
As students work on the task, monitor for groups of students who use different reasons to sort their cards.
Launch
Arrange students into groups of 3. Supply each group with cards cut from the blackline master. Tell students that these cards have different things in common so different groups of students might have different reasons for grouping certain images together. Give students 2–3 minutes of quiet work time followed by a whole-class discussion.
Supports accessibility for: Language; Social-emotional skills
Student Facing
Your teacher will give you a set of cards. Sort the images into groups that make sense to you. Be prepared to explain your reasoning.
Student Response
For access, consult one of our IM Certified Partners.
Activity Synthesis
Select previously identified groups to share their groupings and reasons for grouping them that way.
If not mentioned by students, explain that there are a few ways to sort the cards:
- Based on the solid object that is being cut. (rectangular prism, triangular prism, square-based pyramid, triangle based pyramid)
- Based on the cross section made by the cuts. (parallel to the base, perpendicular to the base, oblique to the base)
- Based on the shape of cross section. Note that there could be two or three groups for these cards: triangles, and quadrilaterals or triangles, rectangles, and trapezoids.
Explain to students that it is possible to create other cross section shapes by cutting these objects in other ways.
Design Principle(s): Cultivate conversation; Maximize meta-awareness
11.4: Drawing Cross Sections (20 minutes)
Optional activity
In this activity, students are given pictures and descriptions of planes cutting prisms and pyramids. Students are asked to draw cross sections freehand but this is not a skill that is required in order for students to be able to describe two-dimensional shapes created from cross sections, which is why this is an optional activity. Some pictures are of a moving plane. Students describe how the cross section changes as the plane moves.
If students have access to the digital activity there are applets to explore the cross sections.
Adapted from applets created in GeoGebra by Anthony C.M. OR.
Launch
Arrange students in groups of 2. Give students 3–5 minutes of quiet work time followed by time to discuss shapes of cross sections with a partner. Follow with a whole-class discussion.
Student Facing
Use the applet to draw each cross section and describe it in words. Start each one by dragging the gray bar on the left side across the screen until you see the whole 3D image on the left and the controls on the right.
-
Here is an applet with a rectangular prism, 4 units by 2 units by 3 units.
- A plane cuts the prism parallel to the bottom and top faces.
- The plane moves up and cuts the prism at a different height.
- A vertical plane cuts the prism diagonally.
- A square pyramid has a base that is 4 units by 4 units. Its height is also 4 units.
- A plane cuts the pyramid parallel to the base.
- A vertical plane cuts the prism.
- A cube has an edge of length 4.
- A plane cuts off the corner of the cube.
- The plane moves farther from the corner and makes a cut through the middle of the cube.
Student Response
For access, consult one of our IM Certified Partners.
Launch
Arrange students in groups of 2. Give students 3–5 minutes of quiet work time followed by time to discuss shapes of cross sections with a partner. Follow with a whole-class discussion.
Student Facing
Draw and describe each cross section.
-
Here is a picture of a rectangular prism, 4 units by 2 units by 3 units.
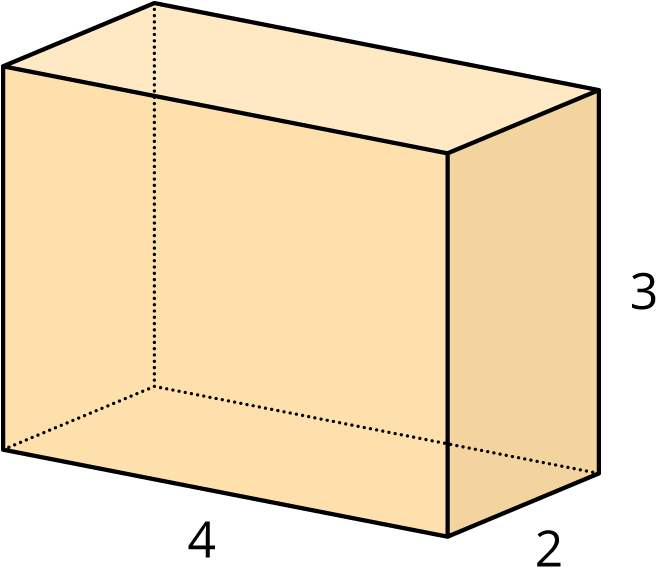
- A plane cuts the prism parallel to the bottom and top faces.
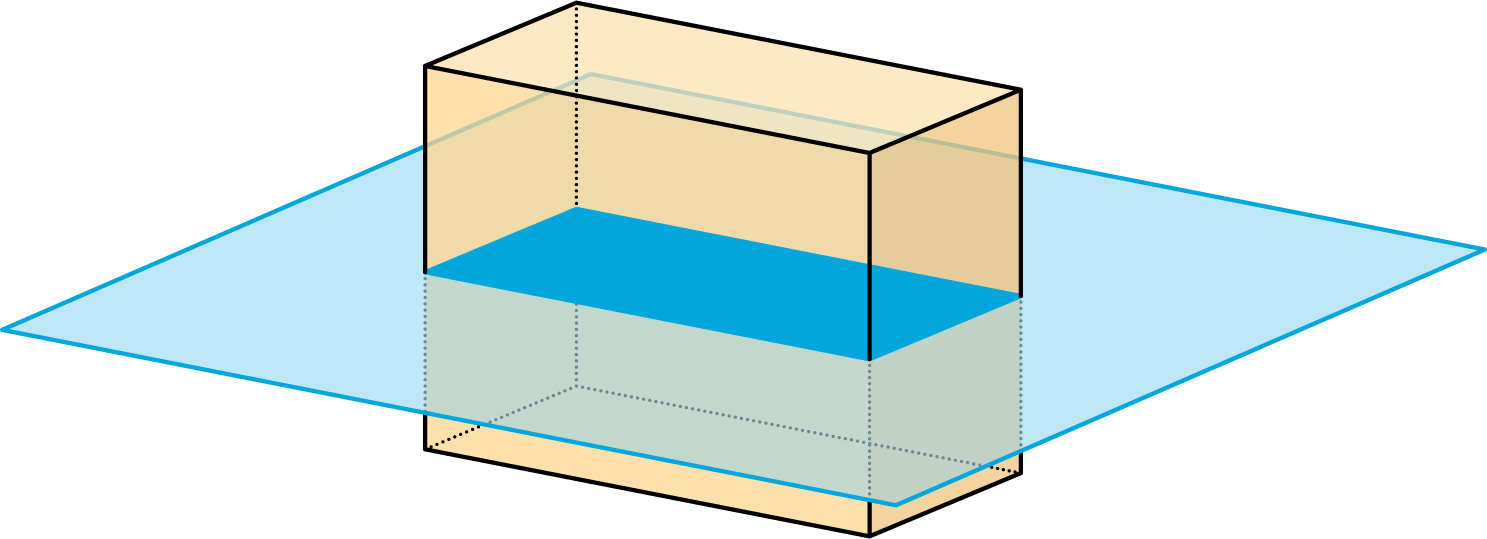
- The plane moves up and cuts the prism at a different height.
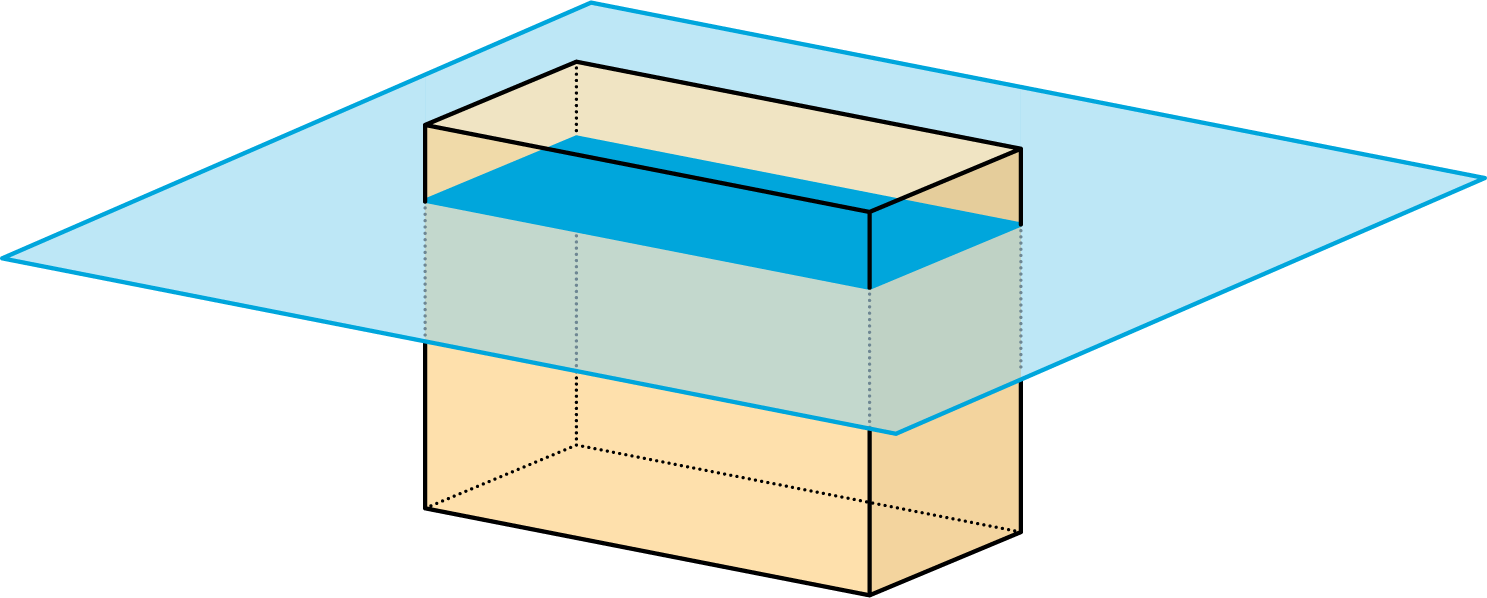
- A vertical plane cuts the prism diagonally.
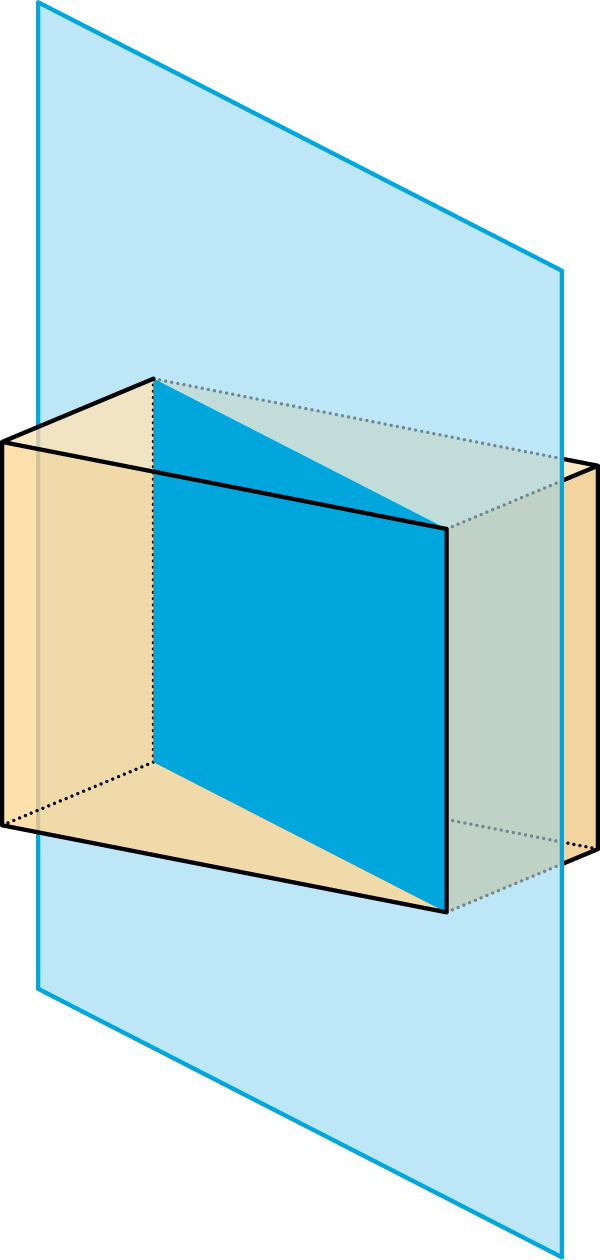
- A plane cuts the prism parallel to the bottom and top faces.
-
A square pyramid has a base that is 4 units by 4 units. Its height is also 4 units.
- A plane cuts the pyramid parallel to the base.
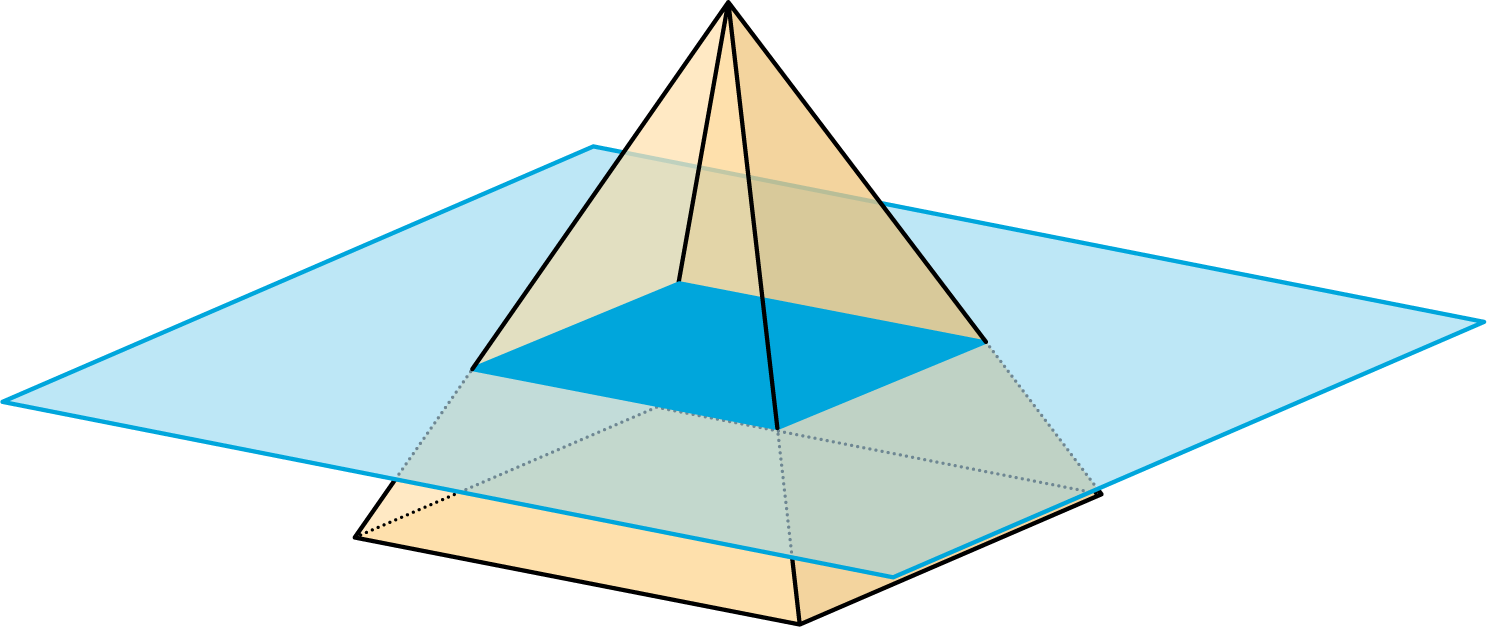
- A vertical plane cuts the prism.
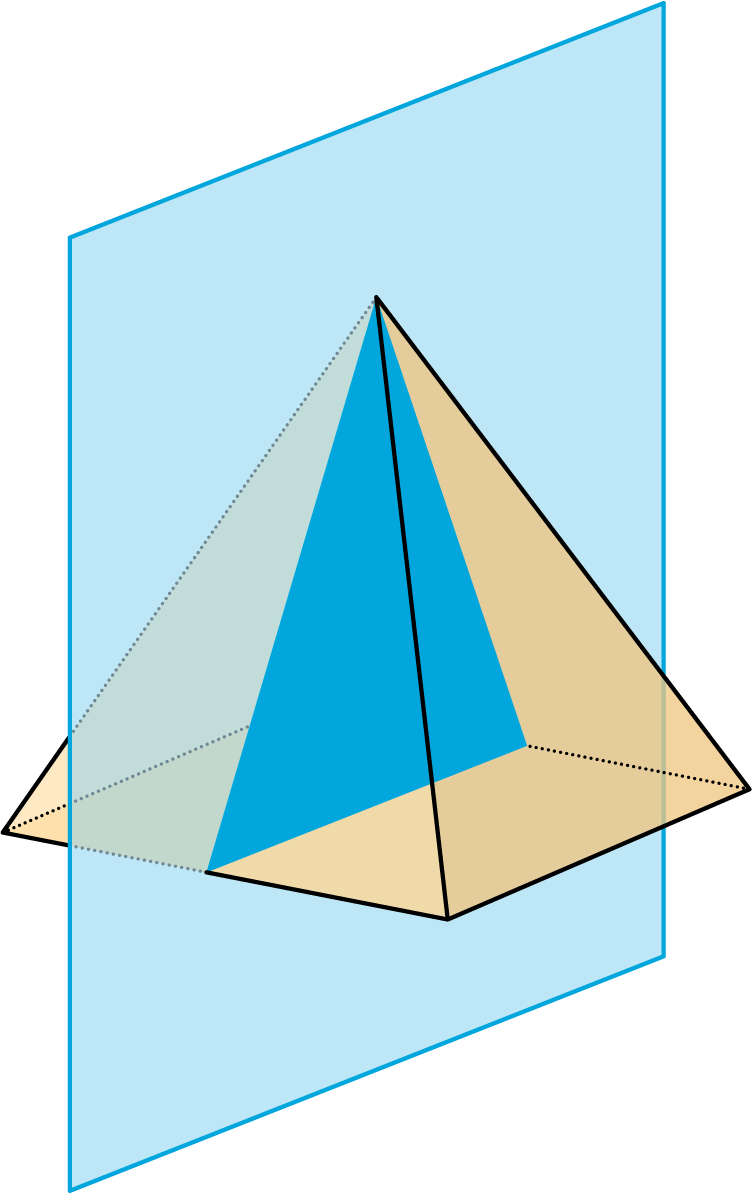
- A plane cuts the pyramid parallel to the base.
-
A cube has an edge of length 4.
- A plane cuts off the corner of the cube.
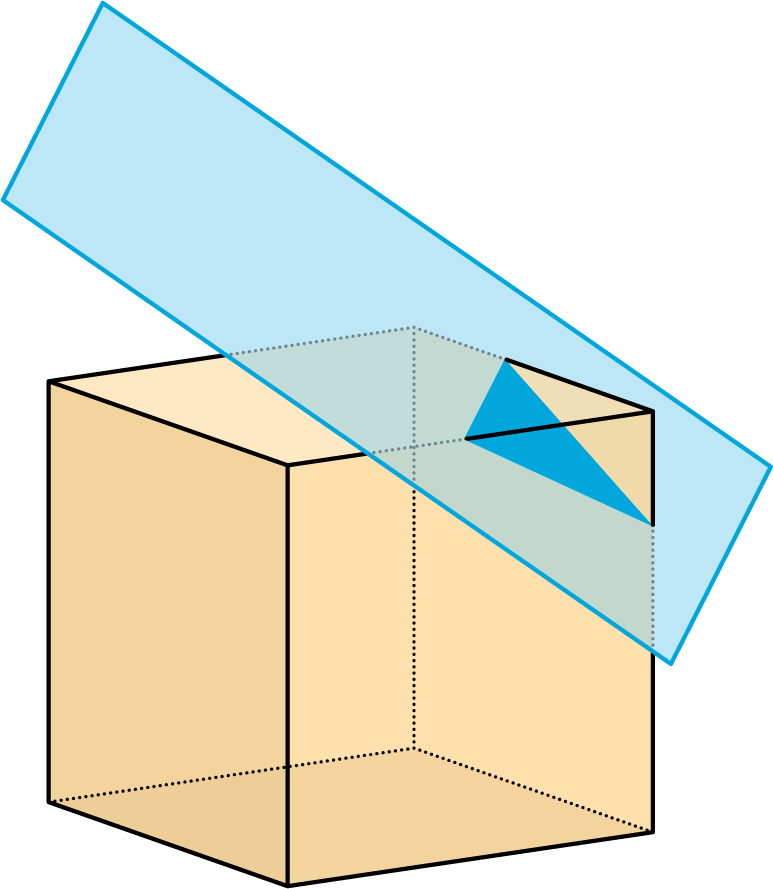
- The plane moves farther from the corner and makes a cut through the middle of the cube.
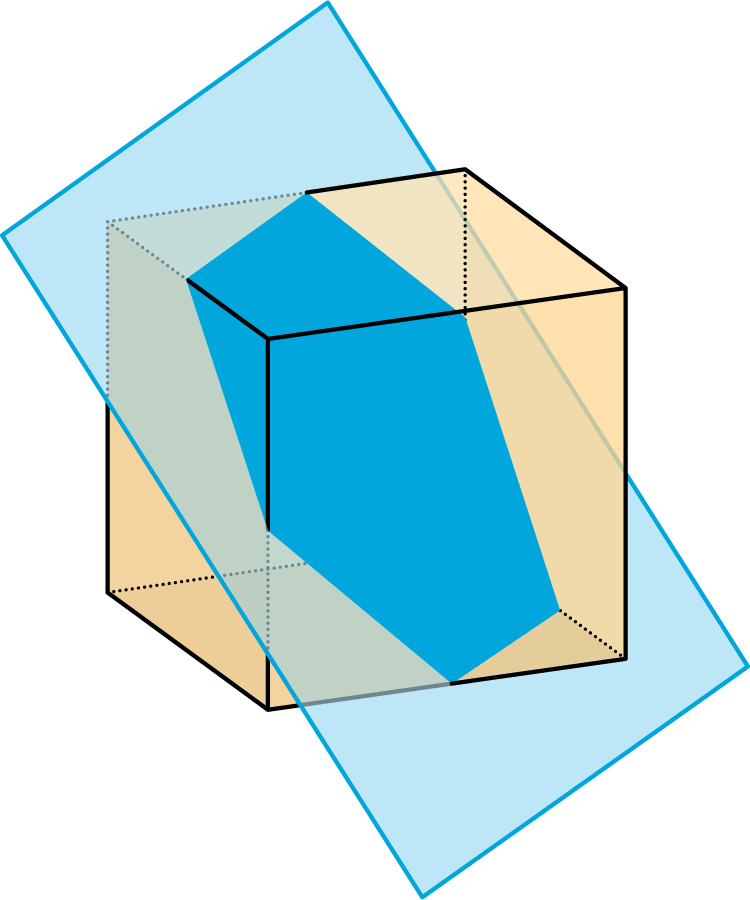
- A plane cuts off the corner of the cube.
Student Response
For access, consult one of our IM Certified Partners.
Activity Synthesis
Select students to share their drawings and descriptions. Consider asking some of the following questions:
- “How did you figure out the shape of the cross section?”
- “What helped you visualize the shape?”
- “Were any of the shapes you drew here similar to the shapes you described in the previous activity?”
Design Principle(s): Cultivate conversation
Lesson Synthesis
Lesson Synthesis
- “What is a cross section?” (It is a two-dimensional shape that results from slicing a three-dimensional object.)
- “What are the possible cross sections that can result from a prism that is sliced parallel to its base?” (All cross sections will be the same size and shape as the base.)
- “Can cross sections of a prism or pyramid be a different shape than the base? Explain or give an example.” (Yes, they can be different. For example, slicing off the corner of a cube can result in a triangle.)
11.5: Cool-down - Pentagonal Pyramid (5 minutes)
Cool-Down
For access, consult one of our IM Certified Partners.
Student Lesson Summary
Student Facing
When we slice a three-dimensional object, we expose new faces that are two dimensional. The two-dimensional face is a cross section. Many different cross sections are possible when slicing the same three-dimensional object.
Here are two peppers. One is sliced horizontally, and the other is sliced vertically, producing different cross sections.

The imprints of the slices represent the two-dimensional faces created by each slice.
It takes practice imagining what the cross section of a three-dimensional object will be for different slices. It helps to experiment and see for yourself what happens!
