Lesson 3
Create and Use a Ruler
Warm-up: Number Talk: Subtract Two Digits (10 minutes)
Narrative
Launch
- Display one expression.
- “Give me a signal when you have an answer and can explain how you got it.”
- 1 minute: quiet think time
Activity
- Record answers and strategy.
- Keep expressions and work displayed.
- Repeat with each expression.
Student Facing
Find the value of each expression mentally.
- \(63 - 3\)
- \(63 - 20\)
- \(63 - 23\)
- \(63 - 24\)
Student Response
For access, consult one of our IM Certified Partners.
Activity Synthesis
- “Which expressions were easier to find mentally? Why?”
- “How did the third expression help you think about the fourth one?”
Activity 1: Create a Ruler (20 minutes)
Narrative
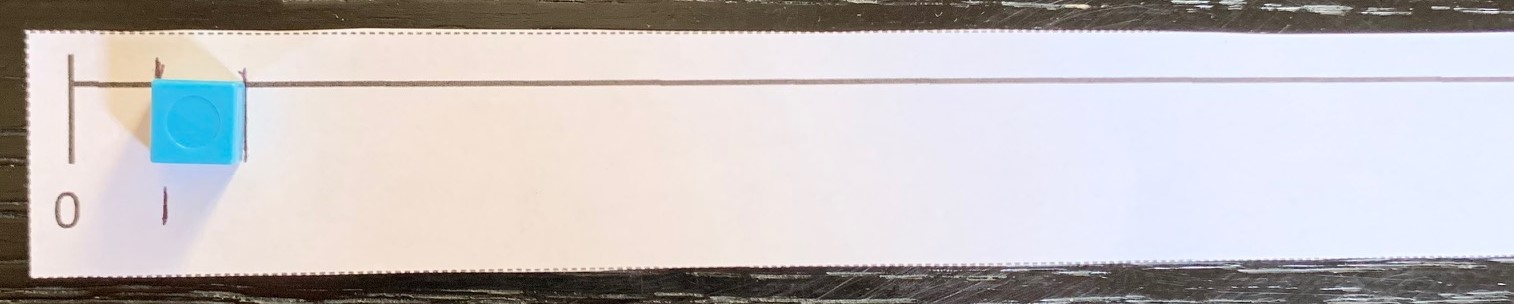
The purpose of this activity is to create a ruler with centimeter units. Students begin their ruler at 0 and measure and label each centimeter up to 25 centimeters. It is important to include 0 on the ruler as this helps build the foundation for making sense of the number line in later lessons. Just as they will on the number line, students label each tick mark—not the space between the tick marks. They notice that the length between successive tick marks on their ruler is 1 centimeter and each tick mark represents a length in centimeters from zero, allowing them to use the ruler to measure without counting cubes (MP2).
This activity uses MLR8 Discussion Supports in the synthesis to support students in describing how their ruler shows different lengths. Advances: speaking
Supports accessibility for: Organization, Memory, Visual-Spatial Processing
Required Materials
Launch
- Groups of 2
- Give each student the Centimeter Ruler Template and access to centimeter cubes and 10-centimeter tools.
Activity
- “We are going to make our own tool to measure in centimeters so we won’t have to carry around so many cubes and blocks.”
- Display the ruler template.
- “What do you notice? What do you wonder?” (It’s a long line. There’s a mark with 0. I wonder why there’s a 0. I wonder if we’ll have to put more numbers on it.)
- 30 seconds: quiet think time
- 1 minute: partner discussion
- Share connections students make to rulers and the need to add more numbers to the ruler.
- “We are going to make a ruler.”
- “What will we need to show on this ruler so we can use it to measure in centimeters? How could we use our other tools to help us?” (We will need lines to show different lengths and numbers to show how long the distance is between them.)
- Ask a student to demonstrate how to line up the edge of the centimeter cube with 0. Draw a tick mark to show the length of 1 centimeter cube.
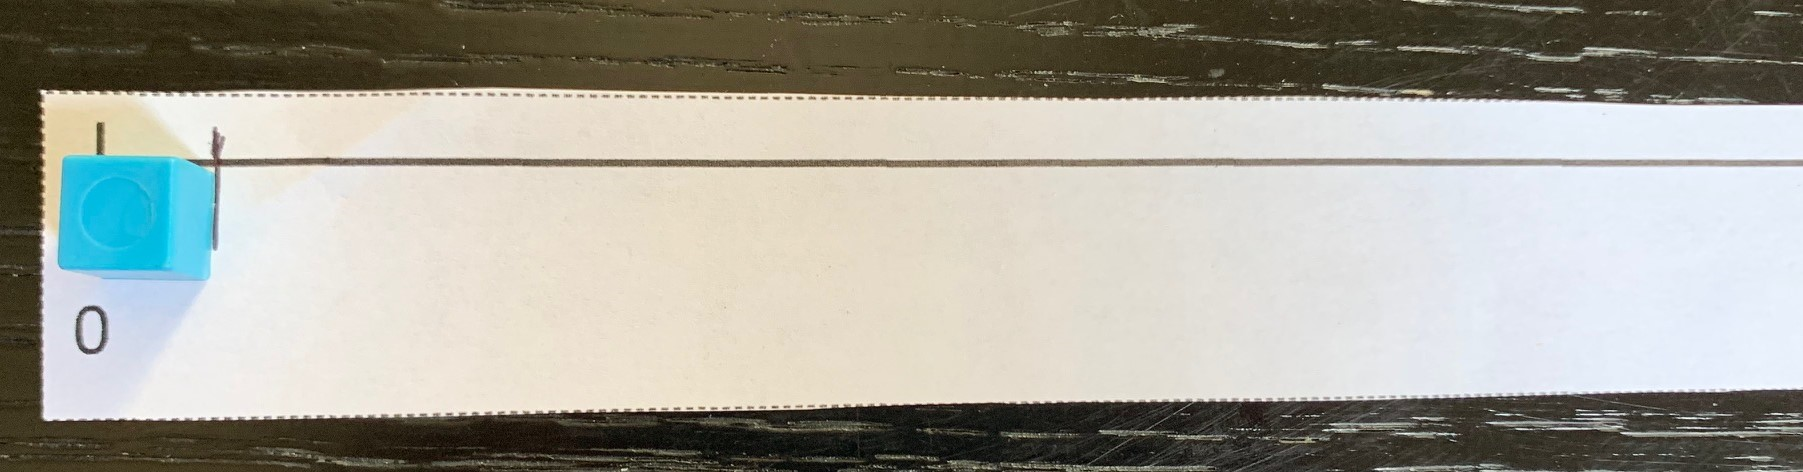
- “How far is the tick mark from 0? How do you know?” (It’s 1 centimeter from 0 because there’s 1 centimeter cube between the tick marks.)
- Label the tick mark and repeat with the first 2-3 centimeters.
- “Complete your own ruler in the same way by marking the length of a centimeter and labeling each new length. Stop when you reach the end of the line and cut out your ruler.”
- 10 minutes: independent work time
- “Compare your ruler with your partner.”
- 2 minutes: partner discussion
Student Facing
- Use your tools to make a ruler that shows lengths in centimeters.
- Compare your ruler with your partner’s ruler.
Student Response
For access, consult one of our IM Certified Partners.
Advancing Student Thinking
If students create intervals that are a measurement other than 1 cm or label spaces instead of tick marks, consider asking:
- “Which tick mark shows __ cm from 0? How can you use your labels to show that length?”
- “Which of your tools should fit between each tick mark?”
- “How can you use your tools to make sure you draw each new tick mark 1 centimeter away from the last tick mark?”
Activity Synthesis
- “How can you use your ruler to show someone how long 1 centimeter is?” (It’s the length from 0 to 1. It’s the length between any two numbers.)
MLR8 Discussion Supports
- If needed, invite students to repeat their reasoning using mathematical language: “Can you say that again, using the phrase I could show them the length from __ to __?”
- “How can you use the ruler to show someone how long 10 centimeters is?” (It’s the length from 0 to 10.)
- “What other lengths could you use your ruler to show?” (Answers vary between 0 and 25 centimeters)
- “Now we have a measuring tool we can use instead of using lots of centimeter cubes. You’re going to use the rulers you've made in the next activity.”
Activity 2: Measure and Compare Lengths (15 minutes)
Narrative
Required Materials
Materials to Gather
Launch
- Groups of 2
- Give each group access to base-ten blocks.
Activity
- “Measure the length of each rectangle with your ruler. You can use the centimeter cubes and 10-centimeter blocks to check your measurement if it helps you.”
- “When you finish, check your measurements with your partner and work together to answer the questions.”
- 3 minutes: independent work time
- 5–7 minutes: partner work time
- Monitor for students who find the difference between the longest and shortest length by:
- directly measuring the length from the end of shortest rectangle to the end of the longest rectangle
- measuring both rectangles and finding the difference
Student Facing
-
Use your ruler to measure the length of each rectangle. Don’t forget to label your measurements.
A 
B 
C 
D 
E 
F 
- How many centimeters longer is rectangle A than rectangle B?
- How many centimeters longer is rectangle F than rectangle D?
- Which two rectangles are the longest? How long would the rectangle be if you joined them together?
Student Response
For access, consult one of our IM Certified Partners.
Advancing Student Thinking
If students have measurements other than the precise measure of each rectangle, consider asking:
- “How did you decide how long the rectangle is?”
- “Where do you see this on the ruler?”
Activity Synthesis
- Share measurements for each rectangle.
- Discuss any differences in measurement.
- “How was the number 0 helpful when you measured each rectangle?” (It showed us where to put the tool. If you start with 0 then the length is the closest number to the end of the rectangle.)
- Invite previously identified students to share how they found the difference between the shortest and longest rectangles.
- “How can we use our ruler to prove that the longest rectangle is 10 cm longer than the shortest rectangle?”
Lesson Synthesis
Lesson Synthesis
“Today, we created a ruler so we didn’t have to line up centimeter cubes or 10-centimeter tools to measure. We learned what the numbers and tick-marks on a ruler represent.”
“How is measuring with a ruler the same as measuring with centimeter cubes or a 10-centimeter tool? How is it different?” (They both measure in centimeters. The ruler just uses a line and tick-marks to show centimeter lengths and the other tools use the edges of the blocks. The ruler is easier to carry around and use to measure longer lengths. You don’t have to count on the ruler if you line up what you are measuring with 0.)
“How did you use a ruler to find how many more centimeters longer one line was than another?” (You can measure from the end of the shorter line to the end of the longer line. You could find the length of both lines on the ruler and count up from the shorter line. You could find both lengths and subtract the smaller length from the larger length).
Cool-down: Use a Ruler (5 minutes)
Cool-Down
For access, consult one of our IM Certified Partners.