Lesson 1
Tessellations of the Plane
1.1: Notice and Wonder: Polygon Patterns (5 minutes)
Optional activity
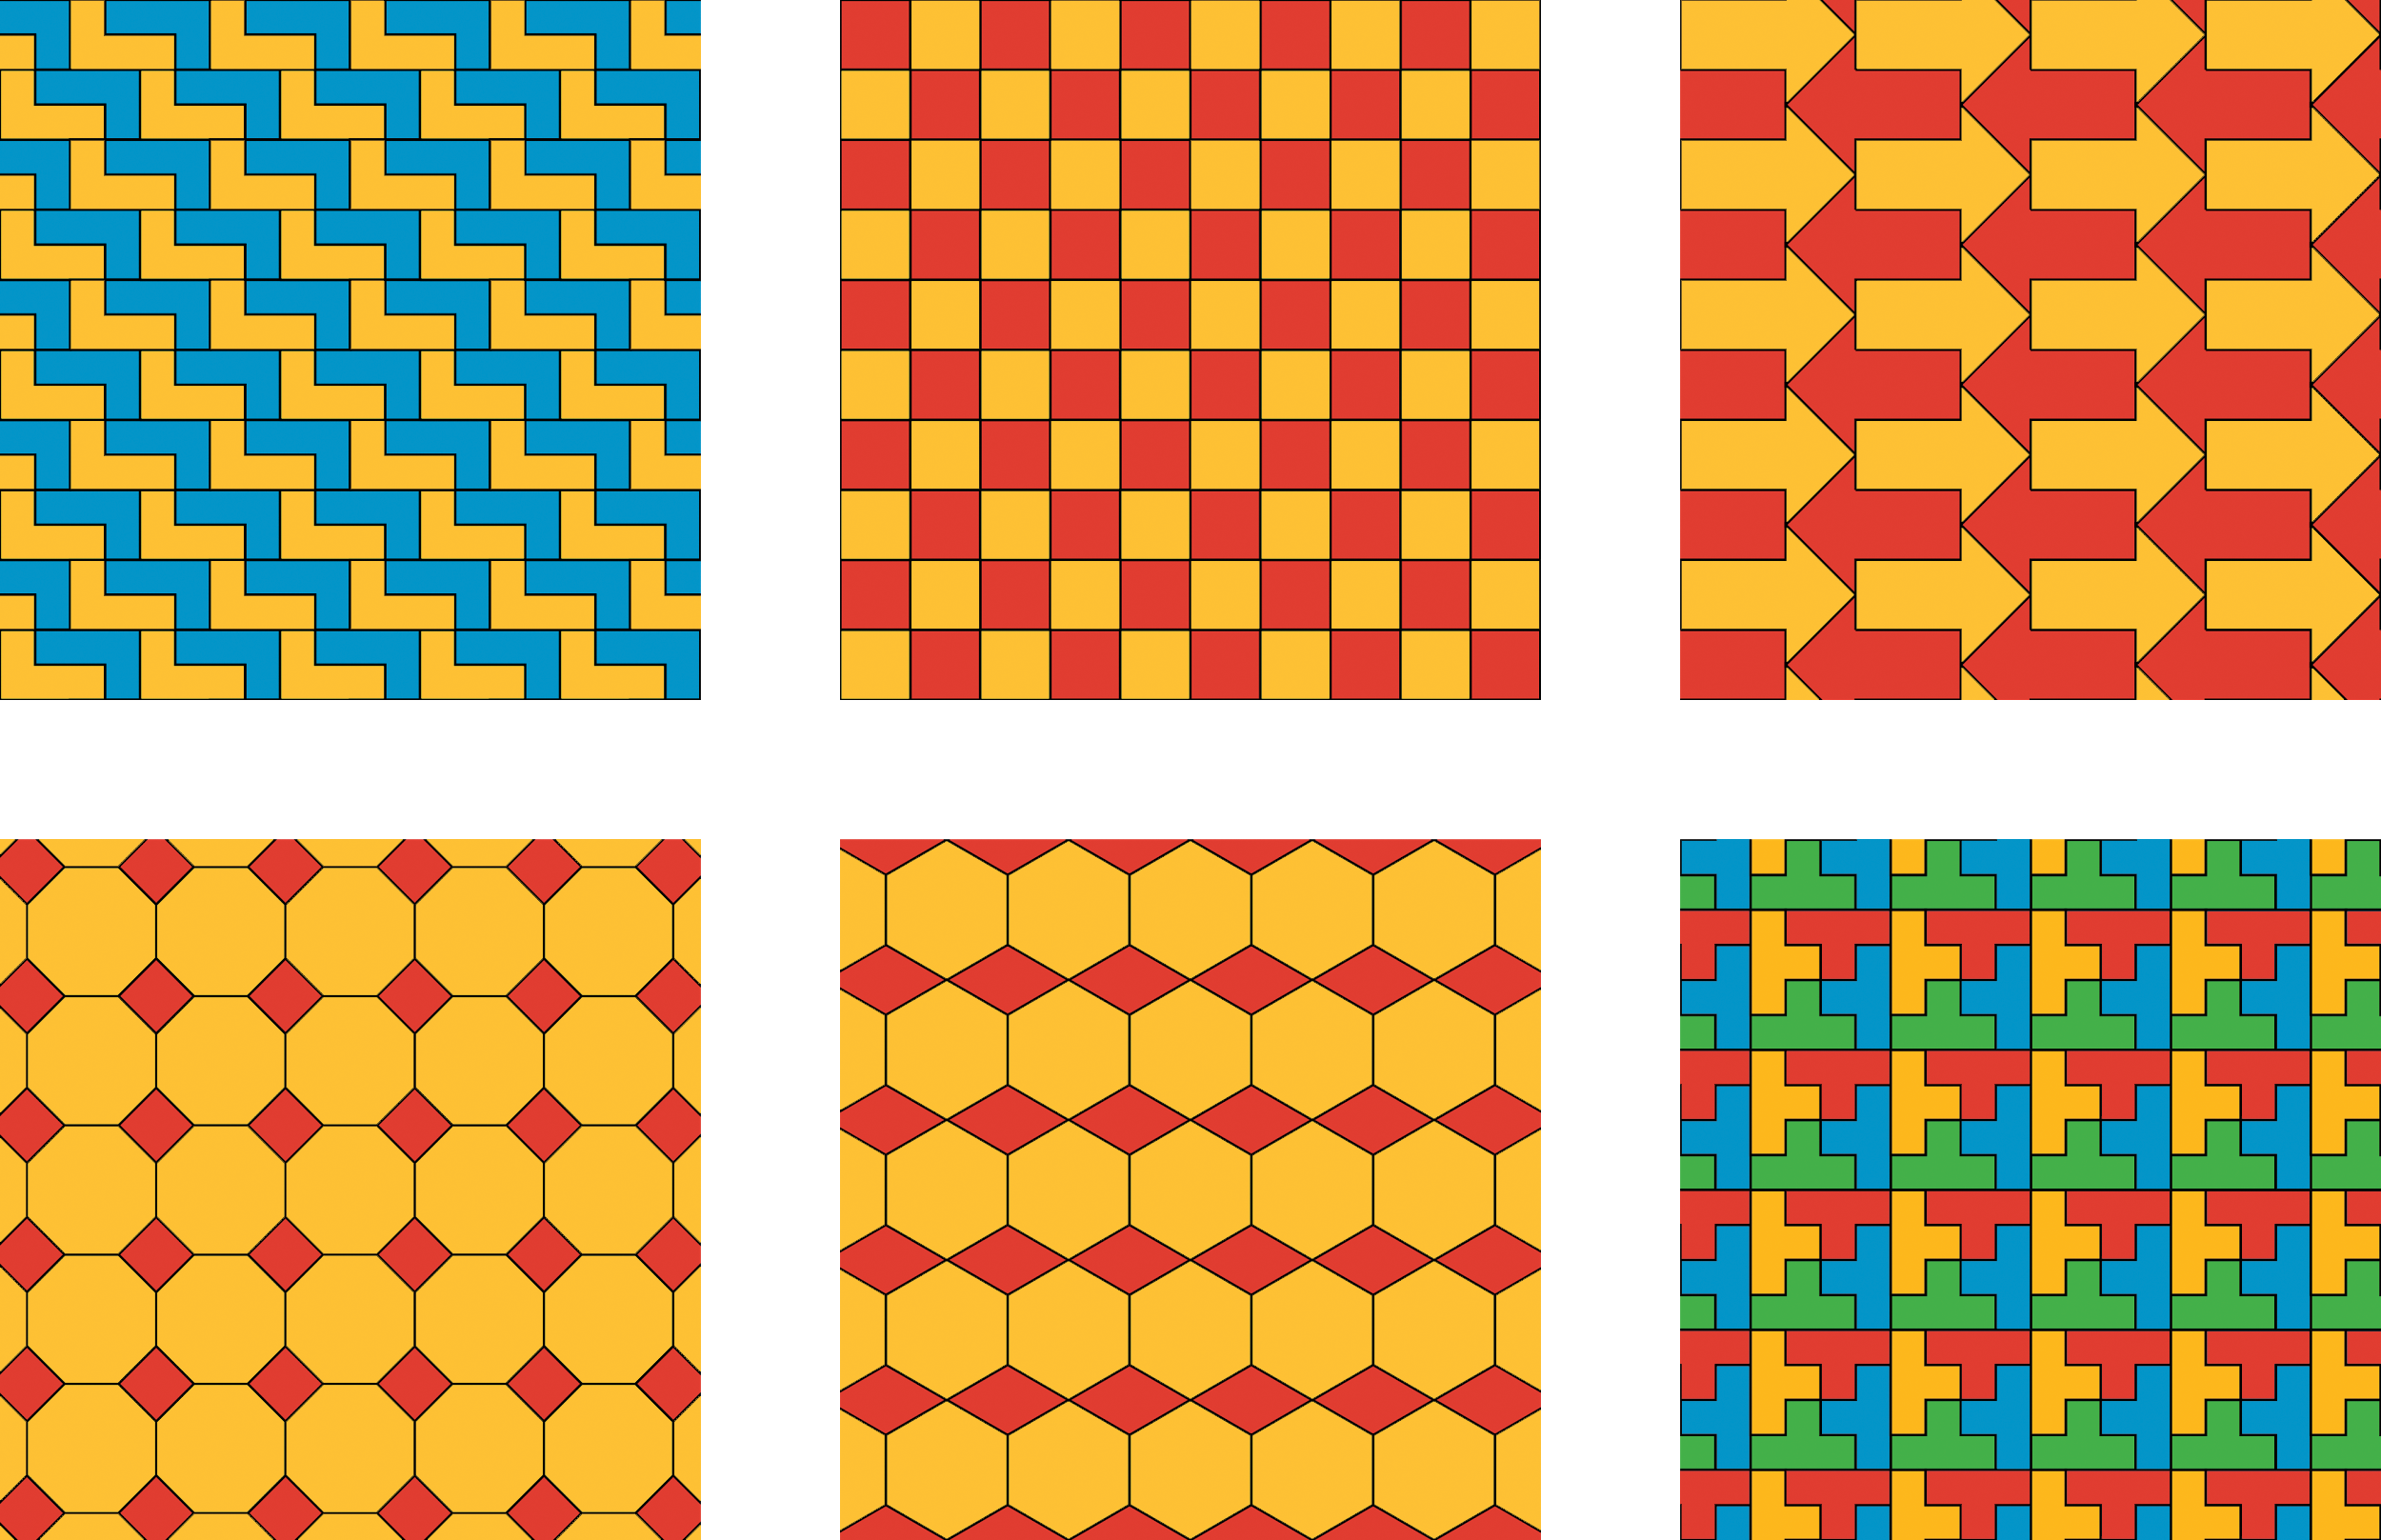
This activity introduces students to patterns of polygons that cover the plane. Examples include:
- patterns using a single shape
- patterns using multiple shapes
Studying these patterns and understanding how and why they repeat to fill up the plane is an example of MP8, expressing regularity in repeated reasoning. In this case, the repeated reasoning is continuing to lay out the shapes in the same pattern.
Launch
Arrange students in groups of 2. Tell students that they will look at a set of images, and their job is to think of at least one thing they notice and at least one thing they wonder. Display the images for all to see. Ask students to give a signal when they have noticed or wondered about something. Give students 1 minute of quiet think time, and then 1 minute to discuss the things they notice with their partner, followed by a whole-class discussion.
Student Facing
What do you notice? What do you wonder?

Student Response
For access, consult one of our IM Certified Partners.
Activity Synthesis
Ask students to share the things they noticed and wondered. Record and display their responses for all to see. If possible, record the relevant reasoning on or near the images. After each response, ask the class if they agree or disagree and to explain alternative ways of thinking, referring back to the images each time.
Important ideas that can come up are the following:
- The shapes in a tessellation cover the plane (or would if the pattern continues) without gaps.
- Sometimes there is only one shape. Sometimes there are several shapes in the tessellation.
- With the square one, all of the squares are complete. In the other patterns, the shapes on the boundary are cut off.
If time allows, ask:
- “How do I know what happens as the tessellation continues to grow off of the page?” (There is often a pattern, but we would have to indicate that the pattern continues.)
- “Are the colors of the shapes important?” (They are important for identifying patterns and making the pictures prettier, but they could be changed and the pattern would still be the same.)
1.2: Tessellations (20 minutes)
Optional activity
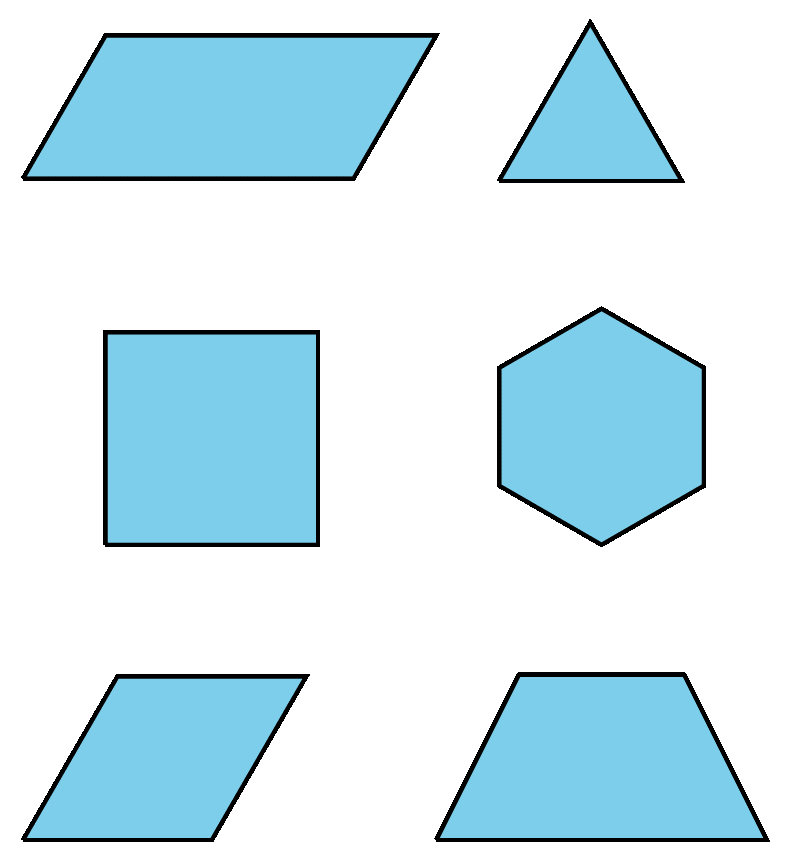
The goal of this task is to introduce the notion of a tessellation and then carefully examine how to create a tessellation with each pattern block shape (square, rhombus, equilateral triangle, isosceles trapezoid). For hexagons, there is only one way to fit them together because there will be gaps unless three hexagons meet at each vertex. The other shapes offer much more flexibility, and students have an opportunity to use their artistic creativity.
Students look for and make use of structure (MP7), both when they try to put copies of the shape together to build a tessellation and when they examine whether or not it is possible to construct a different tessellation.
Launch
Introduce the definition of a tessellation of the plane by polygons: a tessellation covers the plane with copies of the shape with no gaps and no overlaps.
Show the students the image from the previous notice and wonder activity, and ask them if these are tessellations. (Yes.)
Demonstrate how to use tracing paper to create a tessellation.
Arrange students in groups of 2. Each pair uses the same shape for their tessellations.
Design Principle(s): Support sense-making; Optimize output (for explanation)
Student Facing
- With your partner, choose one of the six shapes in the toolbar that you will both use.
- Select the shape tool by clicking on it. Create copies of your shape by clicking in the work space.
- When you have enough to work with, click on the Move tool (the arrow) to drag or turn them.
- If you have trouble aligning the shapes, right click to turn on the grid.
- When you are finished making your tessellation, you can hide the points.
- Compare your tessellation to your partner’s. How are they similar? How are they different?
-
If possible, make a third tessellation of the plane with your shape (different from the ones you and your partner already created). If not possible, explain why it is not possible.
Student Response
For access, consult one of our IM Certified Partners.
Launch
Introduce the definition of a tessellation of the plane by polygons: a tessellation covers the plane with copies of the shape with no gaps and no overlaps.
Show the students the image from the previous notice and wonder activity, and ask them if these are tessellations. (Yes.)
Demonstrate how to use tracing paper to create a tessellation.
Arrange students in groups of 2. Each pair uses the same shape for their tessellations.
Supports accessibility for: Memory; Language
Design Principle(s): Support sense-making; Optimize output (for explanation)
Student Facing

-
Pick one of the shapes. Create a tessellation by tracing copies of your shape. Make sure to use the same shape as your partner.
- Compare your tessellation to your partner’s. How are they similar? How are they different?
- If possible, make a third tessellation of the plane with your shape (different from the ones you and your partner already created). If not possible, explain why it is not possible.
Student Response
For access, consult one of our IM Certified Partners.
Anticipated Misconceptions
Tessellations do not need to be edge to edge. That is, pieces do not need to fit together with edges of the same lengths matching exactly.
Tessellations do not need to have symmetric, repeating patterns, though sometimes the shape forces it (as with the regular hexagons).
Activity Synthesis
Important questions to address include:
- “Were you able to make different tessellations with your shape?” (It depends on the shape.)
- “If not, why not?” (Three hexagons have to come together at each vertex: once the first hexagon of the pattern is placed, everything else has no flexibility.)
- “If so how?” (Triangles can be built into hexagons, or they can make rows that can be translated and stacked on top of one another. Parallelograms can also be made into hexagons or rows. Trapezoids can be made into hexagons or rows. Rhombuses can be made into rows and translated. Squares can also be made into rows and translated.)
- “What does it look like to not define a tessellation?” (Two octagons can be put together sharing a vertex, but there is a gap that is not large enough for a third octagon.)
Make sure, as students share their ideas for tessellations, to use the language of rigid motions to describe the tessellations. For example, if a student has built a tessellation with parallelograms, choose two parallelograms and ask:
- “How can I use rigid motions to move one of these parallelograms into the position of the other?”
- “Are there other ways I could do this?”
1.3: Describing a Tessellation (20 minutes)
Optional activity
The goal of this activity is to accurately describe a tessellation of the plane. While students do not need to use the words translation, rotation, or reflection, their understanding of rigid motions of the plane will play a key role in explaining (and interpreting) where to place each shape in a tessellation. Communicating a geometric pattern clearly in words fully engages students in attending to precision (MP6).
As a warm-up, each student will describe a tessellation while the partner identifies a picture of the tessellation. After a brief discussion of what language was most helpful, students then take turns describing a tessellation as their partner attempts to build the tessellation. They switch roles and then reflect on any misinterpretations that happened and how they may have been related to the language used to describe the tessellations.

Launch
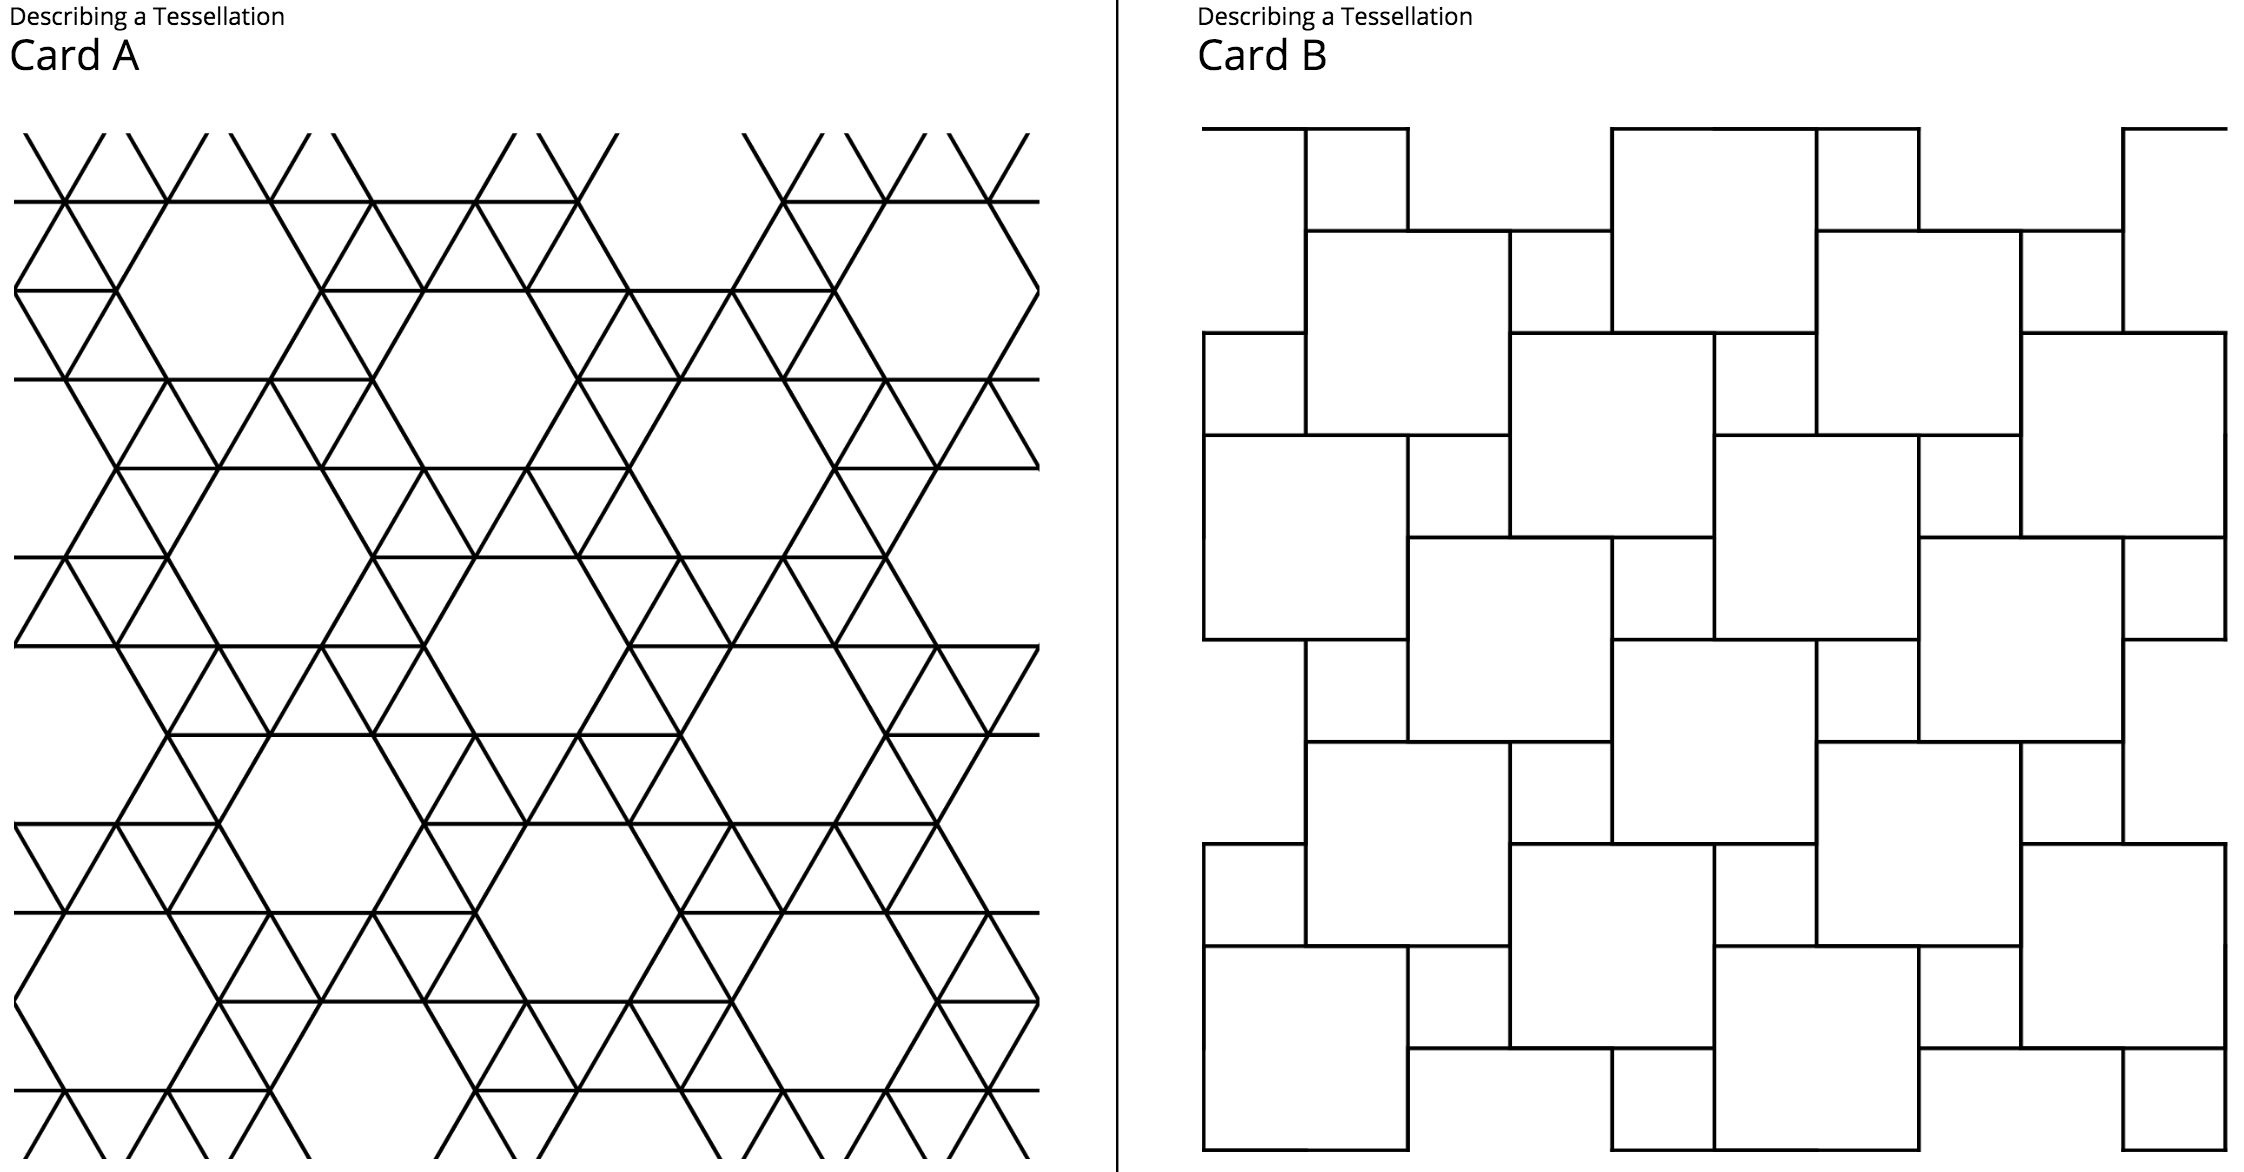
Students work in pairs. Each pair requires a set of 2 cards for Part 2, one card for each student.
Stop students after they have completed Part 1 of the task for the first part of the discussion given in the synthesis.
Supports accessibility for: Memory; Organization
Design Principle(s): Support sense-making; Maximize meta-awareness
Student Facing
-
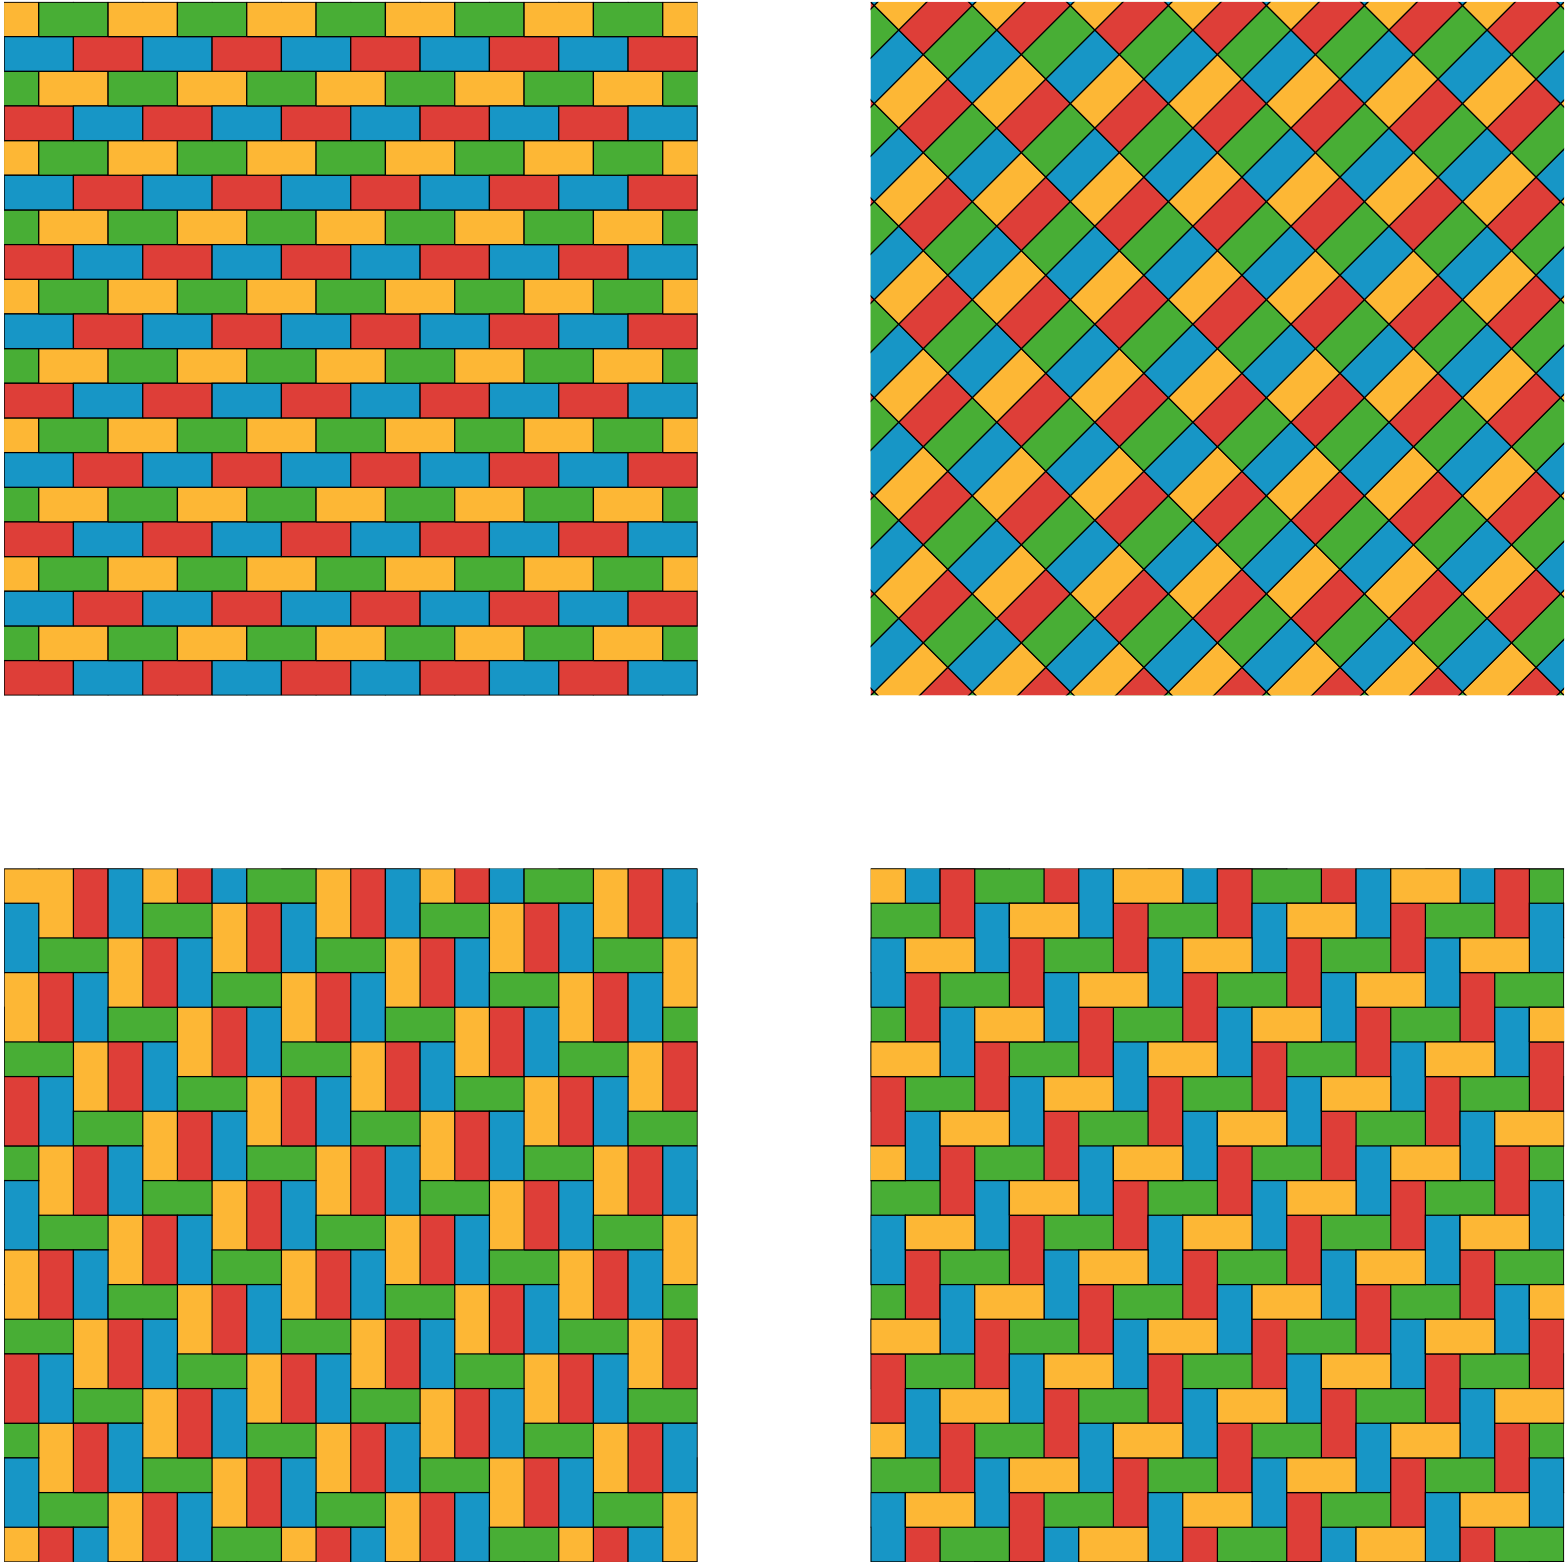
Pick one of the figures and describe the tessellation. Your partner will identify which tessellation you are describing. Then trade roles so your partner describes the tessellation and you identify the figure.

-
You and your partner each have a card with a tessellation. Describe what is on your card so that your partner can produce the tessellation (this should be done so that you cannot see your partner’s work until it is complete).
-
Check together to see if your partner’s tessellation agrees with your card and discuss any differences.
-
Change roles so your partner describes a tessellation, which you attempt to produce.
-
Check the accuracy of your construction and discuss any discrepancies.
Student Response
For access, consult one of our IM Certified Partners.
Activity Synthesis
For the discussion after students complete Part 1:
- “In what ways was describing the tessellation difficult?” (Finding words to communicate how the rectangles are aligned with one another.)
- “Did you use the words translate, rotate, or reflect?” (Instead of “translate” students may use words like “move.” Similarly, students may describe rotations with words like “turn.”)
- “What was challenging about describing or identifying the tessellation?”
For the discussion after students complete Part 2, focus on the use of the words translate, reflect, and rotate (or equivalents).
- “When you used a translation, did you specify the direction and how far?” (Maybe, but they may also use the language “put next to” or equivalent.)
- “When a rotation was involved, did you specify the number of degrees of the rotation?” (Probably not. They will more likely say “rotate until the sides match. . .” or “turn upside down.”)
- “When a rotation was involved, did you specify the center of rotation?” (Answers vary. Probably not.)
- “Did you use any reflections?” (Answers vary.)